Sunday, August 4, 2013
Shrimp Tacos
Sour Cream and Onion Dip
Saturday, July 13, 2013
Gluten Free Zucchini-Walnut Bread
Wednesday, June 1, 2011
Recipe: Streusel Raspberry Muffins
First of all, they are a heavy muffin. They are also a little bit on the dry side, so I would definitely have the milk or coffee by your side when you eat these. That’s the only downside, though. They are really catchy and the raspberries in the middle keep the taste refreshing and help to break up the sweetness. I really enjoyed these and would definitely eat/make them again.
Baking them wasn’t difficult at all. I would suggest though, that the more raspberries you put in the middle, the merrier. I only put 3 or 4 in the middle and felt as though I could’ve put 5 or 6 in the middle of each and would’ve been better off. Also, I couldn’t get the batter to stretch to a full dozen. I got 11 muffins, so just keep that in mind when you pour the batter in the pan.
Here’s the recipe:
“Streusel Raspberry Muffins” (from 25 Years of Favorite Brand Name Baking)
1 ½ cups all purpose flour
2 teaspoons baking powder
½ cup milk
½ cup (1 stick) butter, melted and cooled
1 egg, beaten
1 cup fresh or individually frozen unsweetened raspberries
Preheat oven to 375. Grease 12 standard muffin cups or line with paper baking cups. Prepare Pecan Streusel Topping (recipe below); set aside.
Combine flour, sugar, and baking powder in large bowl. Combine milk, butter and egg in small bowl until blended; stir into flour mixture just until moistened. Spoon half of batter into muffin cups. Divide raspberries among cups, then top with remaining batter. Sprinkle Pecan Streusel Topping over tops. Bake 25 to 30 minutes or until golden and toothpick inserted into centers comes out clean. Cool in pan on wire rack 5 minutes.
Pecan Streusel Topping
Combine ¼ cup each: chopped pecans, packed brown sugar, and all purpose flour in a small bowl. Stir in 2 tablespoons melted butter until mixture resembles moist crumbs.
Rating: A
Recipe: Fudge Dream Bars
I was a little skeptical when I first started to make these. I thought they were going to turn out really cake-y and dry, but trust me, I was in for a shock. The finished product was extremely fudge-y. In fact, at first I wasn’t completely sure that they were done.
Aside from their extreme fudginess, I have to say that they were also really, really sweet, which means that I wasn’t as crazy about them as I thought I would be. I love fudge-like brownies, but the sugar content in these was astronomical, even for me. I definitely think that was the biggest down side to these, and in fact we didn’t finish all of them because of that. My guess is that the icing may have put these over the top.
They were pretty easy to make. They were pretty much like your standard brownie except you didn’t use unsweetened baking bars, but rather unsweetened cocoa.
That being said, don’t take my word for it. Try them yourself! Below is the recipe.
“Fudge Dream Bars” (from Chocolate Treats)
1 cup (2 sticks) butter or margarine
1/3 cup unsweetened cocoa powder
4 eggs
2 cups granulated sugar
2/3 cup all-purpose flour
1 teaspoon vanilla extract
¼ teaspoon salt
For bars, preheat oven to 350. Grease 13x9 inch pan. In medium saucepan, blend 1 cup butter and 1/3 cup cocoa. Cook over low heat, stirring until melted and smooth. Remove from heat and let cool slightly.
In large bowl, beat eggs with mixer on medium speed until blended. Add granulated sugar, flour and cocoa mixture; beat until well blended. Beat in vanilla and salt.
Pour batter into prepared pan. Bake 30 to 35 minutes or until toothpick inserted in center comes out clean. Transfer pan to wire rack to cool completely.
¼ cup (1/2 stick) butter or margarine
1/3 cup unsweetened cocoa powder
4 cups powdered sugar, divided
2 to 4 tablespoons milk
For frosting, in medium saucepan, combine ¼ cup butter and 1/3 cup cocoa. Cook over low heat, stirring until melted and smooth. Transfer to a medium bowl.
With mixer on medium-low speed, gradually beat in 2 cups powdered sugar until blended. Beat in 2 tablespoons milk. Gradually beat in remaining 2 cups powdered sugar and enough remaining milk, 1 tablespoon at a time, until frosting is smooth and spreadable.
Spread frosting over bars in pan. Cut into 32 bars.
Rating: C
Recipe: Iced Oranges
The taste of this is so refreshing. The orange juice and the lemon always mix just right to produce a refreshingly sweet and sour taste. The consistency always turns out, for me, like shaved ice, but I think it’s supposed to be more like a sherbert. It is great during the summer when it’s hot and you just don’t want ice cream, but you want something cold. I personally think it is a great compliment to a dessert, particularly a chocolate one such as brownies.
Making it is a snap. The recipe suggests that you squeeze your own oranges and then use the oranges as the “bowls” for the ice. My recommendation is if you’re not in it for the long haul, which I am most often not, you should just use 100% orange juice (I prefer Simply Orange or Tropicana) and just freeze it in a freezer-friendly plastic container. Squeezing the juice from the oranges and using the oranges as bowls, while cute and can be very flashy, is EXTREMELY time consuming (a lot longer than it has to be) and frankly, the time that I put into it wasn’t worth the end product. However, if you have time to kill and really just want to impress, have at it.
One final tip when making this recipe –I find that the more lemon juice I add (without turning the whole thing into a lemon flavor) the better it tastes. I would definitely taste it before you put it in the freezer for the first time and adjust it to how you like it.
Ok, here’s the recipe:
“Iced Oranges” (from Mediterranean: A Taste of the Sun in Over 150 Recipes)
Juice of 1 lemon
14 medium oranges* (substitute for 3 cups of orange juice)
8 fresh bay leaves, to decorate
Put the sugar in a heavy pan. Add half the lemon juice and ½ cup of water. Cook over low heat until the sugar has dissolved completely. Bring to a boil and boil for 2-3 minutes, until the syrup is clear. Let cool.
Slice the tops off eight of the oranges to make “hats”. Scoop out the flesh of the oranges and reserve. Put the empty orange shells and “hats” on a tray and place in the freezer until needed. *SKIP THIS STEP IF YOU ARE ONLY USING ORANGE JUICE
Grate the zest of the remaining oranges and add to the syrup. Squeeze the juice from the oranges and from the reserved flesh. There should be 3 cups. Squeeze another orange or add bought orange juice, if necessary. *ADD THE 3 CUPS OF ORANGE JUICE HERE INSTEAD OF DOING THIS STEP.
Stir the orange juice and remaining lemon juice, with 6 tablespoons water, into the syrup. Taste, adding more lemon juice or sugar, as desired. Pour the mixture into a shallow freezer container and freeze for 3 hours.
Transfer the mixture into a bowl and whisk to break down the ice crystals. Freeze for 4 more hours until firm but not solid.
Pack the mixture into the orange shells, piling it up, and set the “hats” on top. Freeze until ready to serve. Just before serving, push a skewer into the tops of the “hats” and push a bay leaf into each one.
Rating: A
Friday, April 8, 2011
Recipe: Quick Oatmeal-Chocolate Chip Bars
I’ve been trying to find recipes lately that would start utilizing some of the left over ingredients that I had purchased before for other recipes. When I saw this recipe I thought this would be great since it seemed that it would turn out to be delicious, easy, and as I panned through the contents, I noticed I had most of what it called for. On a separate note, I will warn you that this isn’t a recipe that is for people who are dieting or are conscious about corn syrups and sugars since it does call for dark corn syrup and a lot of other sweet things (sugar, sweetened flaked coconut, chocolate, etc.).
Now that the background story and the precautions are out of the way, here’s what I thought.
Baking
The preparation for this dessert was extremely easy. Because it uses Bisquick, which is practically instant cookie dough, putting everything together was a snap. It took about 10-15 minutes. The “most difficult” part was melting the butter (or, in this case, margarine) with the dark corn syrup on the stovetop.
There was little clean-up (a saucepan, a bowl, a measuring cup, and 2 spoons).
It took 40 minutes in the oven. I set the timer to 35 and I probably could’ve taken them out then, but I left them in for a couple more minutes for extra measure.
Finally, I liked that the bars didn’t have to be removed from the pan that I used. I simply cut the bars, left them in the glass dish, and put a cover on it.
I definitely give this an A+.
Taste
I was very eager to try these seeing as how I love the combination of oats and chocolate. I wasn’t disappointed. They were very chewy, and a little on the tough side. I attribute this to leaving it in the oven a couple of minutes longer than it should have. I also felt the taste was really oat-y, which I enjoy, but I probably could’ve cut back just a little. The coconut flavor wasn’t overpowering. In fact, it added a nice background flavor to it. The peanuts were the strangest dynamic to this. In retrospect I probably should have chopped the peanuts a little bit since it was weird and a little bit much on my palette when I encountered a cluster of peanuts in my bar.
Over all, I give the taste an A. I loved how chewy they were and I loved how all of the tastes blended together.
Recipe
Quick Oatmeal-Chocolate Chip Bars (taken from Creative Recipes with Bisquick vol. II, 1986)
¼ cup dark corn syrup
1 ½ cups Bisquick baking mix
1 ½ cups quick-cooking oats
½ cup sugar
½ cup flaked coconut
½ cup salted peanuts
1 package (6 ounces) semisweet chocolate chips
1 egg
Heat oven to 300.
Mix margarine and corn syrup in 1 quart saucepan over medium-low heat, stirring constantly, until margarine is melted; reserve. Mix remaining ingredients except egg in large bowl; stir in corn syrup mixture and egg until moistened. Pat in ungreased rectangular pan, 13x9x2 inches.
Bake until light golden brown, 35 to 40 minutes. Immediately cut into bars, about 3 x 1 ½ inches; cool in pan 20 minutes. Remove from pan; cool completely.
Makes 40 bars.
Tuesday, March 1, 2011
Recipe: Velvet Crumb Strawberry Dessert
Taste: Wonderful. I loved how all of the tastes of the strawberry, the cake, and the cream cheese blended together into one smooth, delightful taste. It particularly worked out because the strawberries that I had were slightly on the tart side, so the dessert wasn't sickeningly sweet. The cream cheese, which I was skeptical about, gave it a great twist.
Grade: A
Cooking: For a cake, extremely easy. The recipe calls for a baking mix, which takes a lot of the mixing out of the picture when you're making the cake. In fact, the glaze was the hardest part. It comes together really quickly.
Grade: A
This is a great dessert for the summer or even spring during Easter.
Here's the recipe:
Velvet Crumb Strawberry Dessert (Summer Fresh Fruits and Vegetables, 1989)
1 1/2 cups baking mix (Bisquick)
1/2 cup sugar
1/2 cup milk or water
2 tablespoons shortening
1 teaspoon vanilla
1 egg
Strawberry glaze (recipe below)
2 packages (3 ozs each) cream cheese, softened
1 teaspoon grated lemon peel
1 1/2 cups strawberry halves
Heat oven to 350. Grease and flour round pan, 9 x 1 1/2 inches. Beat baking mix, sugar, milk, shortening, vanilla, and egg in large bowl on low speed, scraping bowl frequently, 30 seconds. Beat on medium speed 4 minutes. Pour into pan. Bake until wooden pick inserted in center comes out clean, 30 to 35 minutes. Cool 5 minutes; invert on serving plate.
Prepare strawberry glaze; cool. Mix cream cheese and lemon peel; spread over top of cake. Arrange strawberries on cream cheese mixture; pour strawberry glaze over strawberries. Refrigerate until set, at least 1 hour. Refrigerate any remaining dessert.
Strawberry Glaze
1/2 cup strawberries
1/2 cup sugar
1 tablespoon cornstarch
1/4 cup water
1/2 teaspoon lemon juice
3 or 4 drops red food color
Mash strawberries. Mix sugar and cornstarch in 2-quart saucepan. Gradually stir in strawberries and water. Cook over medium heat, stirring constantly, until mixture thickens and boils. Boil and stir one minute. Stir in lemon juice and food color; cool.
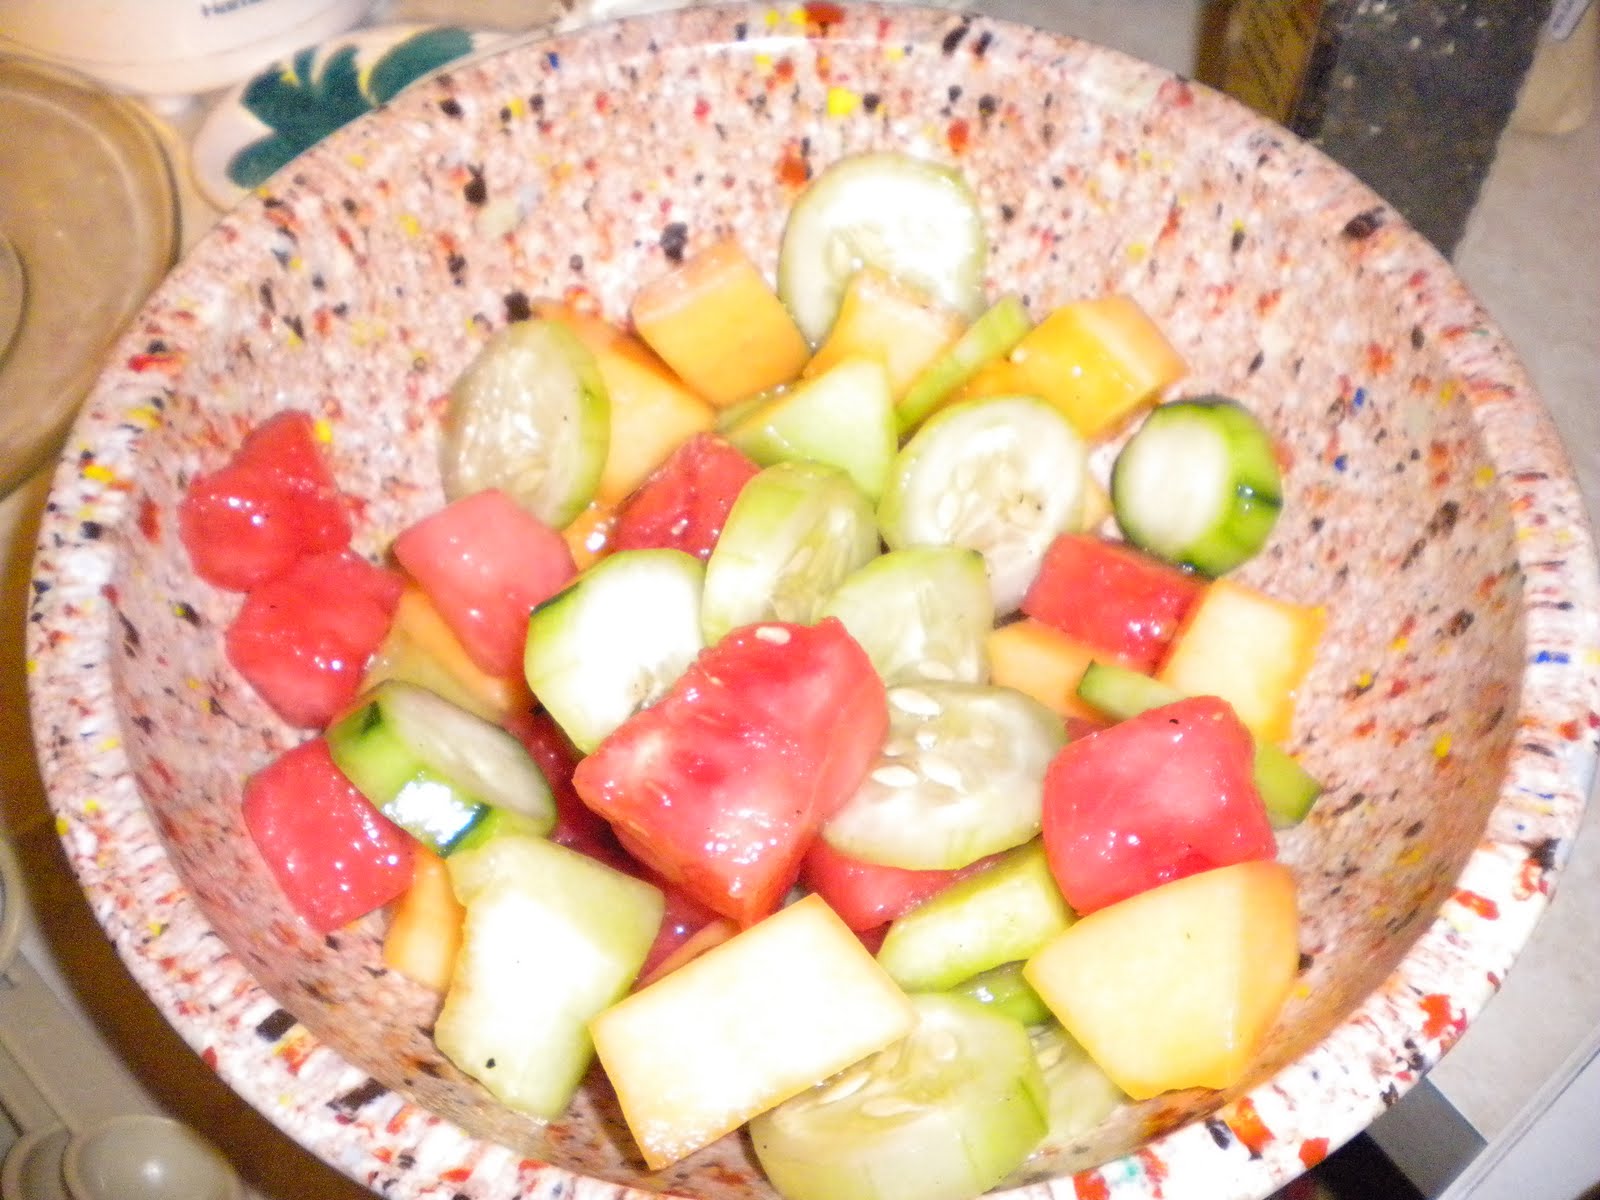
Recipe: Melon Cucumber Salad
Taste: It is wonderfully refreshing. When I first ate this, I thought that it needed a different dressing because I didn't soak the melon for all 8 hours, but I have to say- the longer the melon sits in the oil and dressing, the better it is. The next day, this salad was fantastic, and it definitely did not need a different dressing. So, lesson- soak it for all 8 hours...at least.
Grade: A
Cooking: Extremely easy. The only thing is getting the melon and it has to soak for a while.
Grade: A
I would definitely serve this during the summer at any time.
Here's the recipe:
Melon Cucumber Salad (from Summer Fresh Fruits and Vegetables, 1989)
1/4 cup vegetable oil
2 tablespoons lemon juice
1/2 teaspoon sugar
1/4 teaspoon salt
Dash of freshly ground pepper
3 cups 3/4-inch pieces melon (honeydew, watermelon, cantaloupe)
2 small cucumbers, thinly sliced
Assorted salad greens
Mix oil, lemon juice, sugar, salt, and pepper in tightly covered container; toss with melon and cucumbers. Cover and refrigerate up to 8 hours. Drain; toss with salad greens.
Friday, January 7, 2011
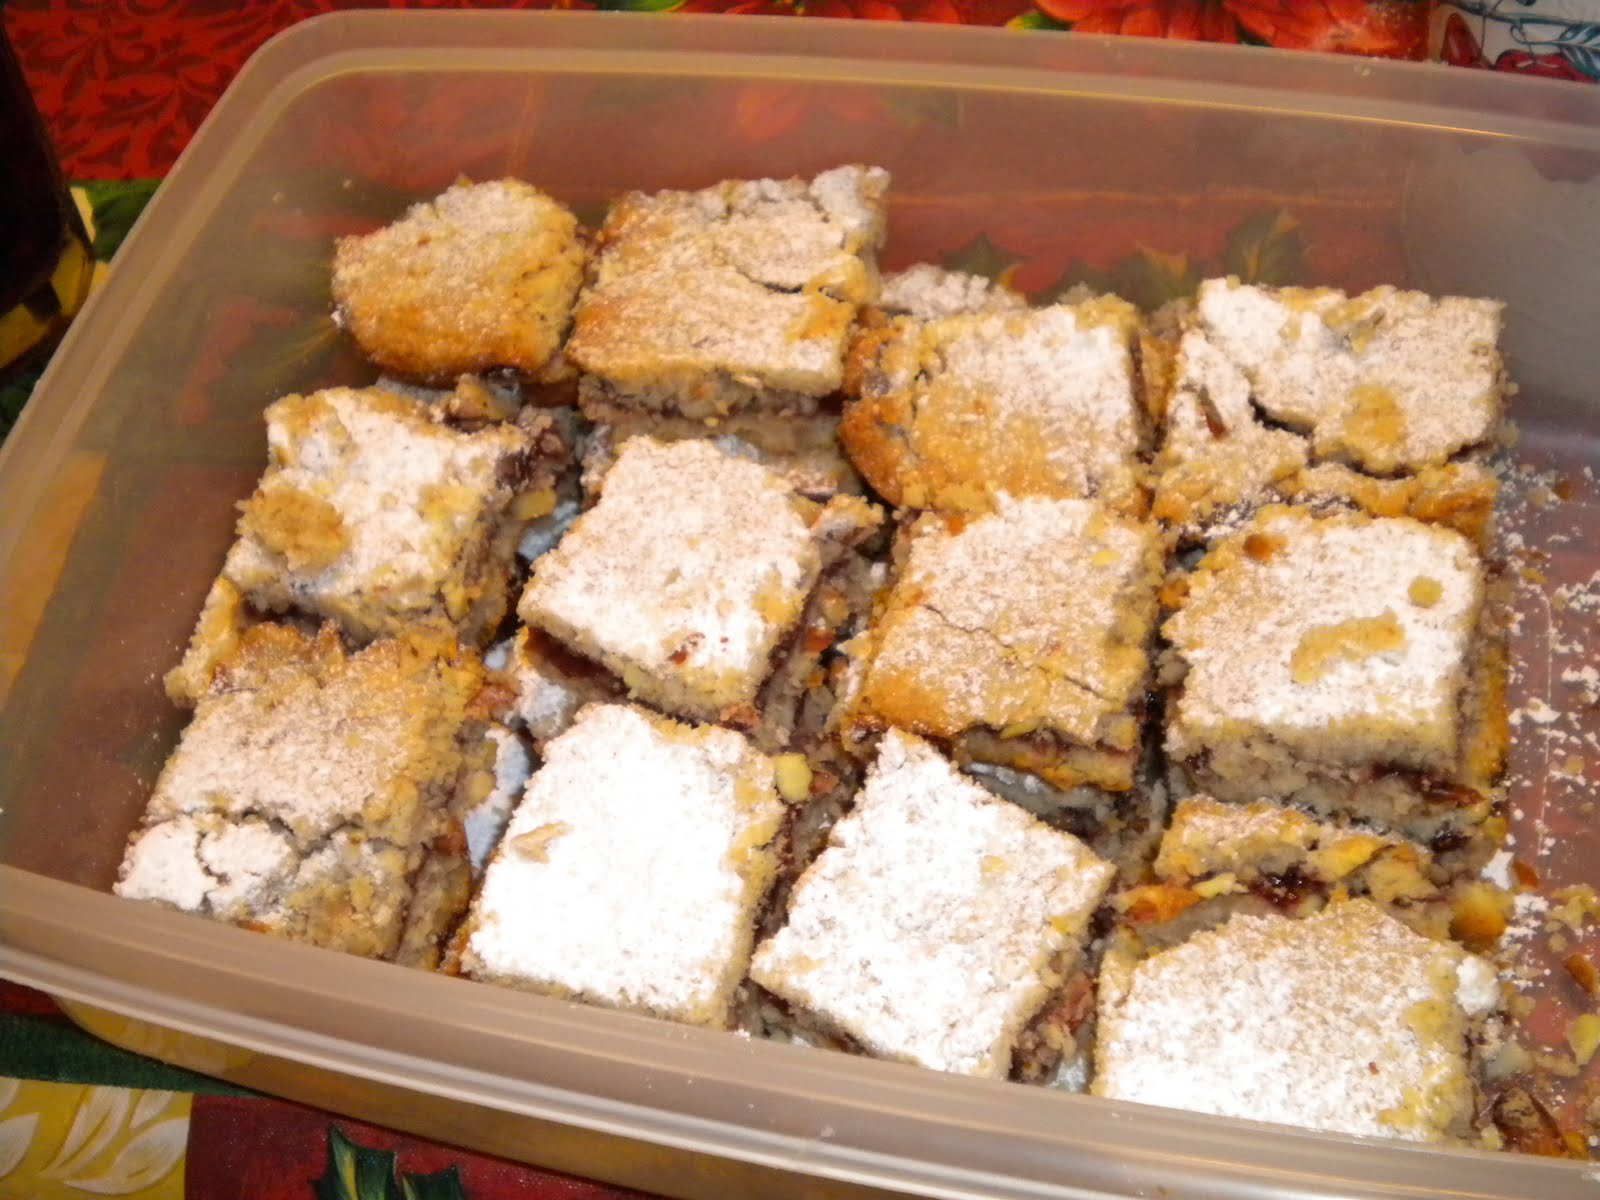
Recipe: Yuletide Linzer Bars
I liked these. They were a favorite amongst the family as well. They are good with a hot cup of coffee or tea. The crust is like a crumble, with a light cinnamon flavor and ground almonds. The raspberry preserves in the middle at a delicious tartness to it that allows the cookie bar to not be too overbearingly sweet. I thought the raspberry was a great touch (as opposed to cherry or any other flavor).
Taste grade: A
Baking these were quite fun, in my opinion. The hardest part was crushing the almonds and putting the dough on top of the preserves. I noticed that there is just enough dough to make the bars. No waste, which we all know I love. In fact, the top will have holes in it and won't quite cover the preserves in parts, which is perfectly fine. After they come out of the oven, they are easy- one and done. Sprinkle some powdered sugar on top and your finished! Over all, I think this was the most put together and best recipe out of the three that I did.
Cook grade: A+
Here is the recipe:
Yuletide Linzer Bars (from Santa's Favorite Cookies: Sweet Treats for the Christmas Season, 1999)
1 1/3 cups butter or margarine, softened
3/4 cup sugar
1 egg
1 teaspoon grated lemon peel
2 1/2 cups all purpose flour
1 1/2 cups whole almonds, ground
1 teaspoon ground cinnamon
3/4 cup raspberry preserves
Powdered sugar
Preheat oven to 350. Grease 13 x 9 inch baking pan.
Beat butter and sugar in large bowl with electric mixer until creamy. Beat in egg and lemon peel until blended. Mix in flour, almonds, and cinnamon until well blended.
Press 2 cups dough into bottom of prepared pan. Spread preserves over crust. Press remaining dough, a small amount at a time, evenly over preserves.
Bake 35 to 40 minutes until golden brown. Cool in pan on wire rack. Sprinkle with powdered sugar; cut into bars.
Saturday, September 18, 2010
Recipe: Chocolate Chip 'N Oatmeal Cookies

Sunday, September 5, 2010
Recipe: Individual Chocolate Cream Pies
So, what do I have to say about this creation? Well, I definitely liked it. Although, I think I enjoyed making it more than eating it (I don't really like graham cracker crust), however, that's not to say that these little guys aren't delicious because they are! The chocolate filling is amazing...light, fluffy, and a perfect dessert after a heavy meal (mom made lasagna for labor day!). A strong cup of coffee is the perfect complement.
The pros to making this are the following: they are extremely fast to make (10-15 minutes max- truly!), no actual cooking (it's just a bunch of blending and whipping), EXTREMELY easy clean-up, and it has the potential for A LOT of variation.
The cons? It's not really a con so much as just something to keep in mind- you have to refrigerate them for a bit before serving so the mousse sets. Otherwise, the filling gets a little runny. Other than that, though, no complaints from me!!
Occasion? If you're truly ambitious, you can prepare these for a small party. Warning though- the recipe only makes 6 at a time, so if you're going to make them for a lot of people, prepare to be by the mixer for awhile. As I stated before, they would be great after a large meal. They
And now for the recipe (from Hershey's Fabulous Desserts-1989):
Individual Chocolate Cream Pies
1 1/2 ounces (1/2 of 3-ounce package) cream cheese, softened
6 tablespoons sugar
1/2 teaspoon vanilla extract
2 1/2 tablespoons Hershey's Cocoa
2 1/2 tablespoons milk
1 cup chilled whipping cream (also called heavy cream)
6 (4-ounce package) single serve graham crusts
Whipped Topping (optional)
Hershey's mini chips semi-sweet chocolate (optional)
In small mixer bowl beat cream cheese, sugar and vanilla until well blended. Add cocoa alternately with milk, beating until smooth. In separate bowl beat whipping cream until stiff; fold into chocolate mixture. Spoon into crusts. Cover; chill until set. Garnish with whipped topping and mini chips.
That's everything!
A couple of things I did differently here though: I didn't include the mini chips in my garnish, and instead of using a small bowl to beat the cream cheese, sugar and vanilla, I used a large bowl. It was a little difficult, but it still got the job done. Also, when you buy the cream cheese, they do have 3-ounce cream cheese blocks. They are considerably smaller than the regular rectangle that you get. These are shaped in a square. Just make sure you look at the package to see what you're getting.
Stay tuned for the next recipe- Mint 'n chocolate fudge.
Monday, August 30, 2010
Recipe: Peanut Butter-Fudge Marble Cake
I was skeptical of this cake at first because I was afraid that it would be overloaded with peanut butter flavor, however, I was pleasantly surprised. The peanut butter flavor was not overpowering and blended in extremely well. It was delicious. I actually like this cake better than the Devil's Delight Cake; however, they are both two completely different flavors, so I guess it's to your taste preference.
The only thing about this recipe is that it was a bit more complicated than the first one and it did take a bit more time. However, there were two layers, so I guess that would do it. I definitely wouldn't classify this cake as quick and easy, however, I know from experience that it was easier to make than most. Also, the recipe doesn't tell you that when you melt the peanut butter morsels, you have to make sure that the water underneath (if you use a double boiler) doesn't get too hot or the steam will burn the peanut butter.
The cake itself would serve as a fantastic company cake or a great cake for a football party or summer party.
Here's the recipe from Hershey's Fabulous Desserts (1989):
1 package (18.25 or 19.75 ounces- I used 18.25) fudge marble cake mix
3 eggs
1/3 cup plus 2 tablespoons vegetable oil, divided
Water
1 cup Reese's Peanut Butter Chips
Heat oven to 350. Grease and flour two 8- or 9- inch round baking pans. Prepare cake batters according to package directions using eggs, 1/3 cup of oil and water. In top of double boiler over hot, not boiling, water melt peanut butter chips with remaining 2 tablespoons oil, stirring constantly OR in small microwave safe bowl place chips and oil. Microwave at HIGH 45 seconds; stir. If necessary, microwave at HIGH additional 15 seconds or until melted and smooth when stirred. Gradually add peanut butter mixture to vanilla batter, blending well. Pour peanut butter batter into prepared pans. Randomly place spoonfuls of chocolate batter on top; swirl as directed on package. Bake 30 to 40 minutes or until wooden toothpick inserted in center comes out clean. Cool 15 minutes; remove from pans to wire rack. Cool completely; frost as desired.
For the icing I used the following (Warning: You will need to double this recipe to cover the whole cake):
Easy Cocoa Frosting
3 tablespoons butter or margarine, softened
1/4 cups Hershey's cocoa
1 and 1/3 cups confectioners' sugar
2 to 3 tablespoons of milk
1/2 teaspoon vanilla extract
In small mixer bowl combine all ingredients; beat to spreading consistency.
That's everything! Until the next recipe (Mint chocolate fudge, perhaps???), enjoy!
Wednesday, August 25, 2010
Recipe: Devil's Delight Cake
Here is the recipe, again taken from Hershey's Fabulous Desserts (1989):
1 package (18.25 ounces) devil's food cake mix (with pudding in the mix)
4 eggs
1 cup water
1/2 cup vegetable oil
1 cup chopped nuts
1 cup miniature marshmallows
1 cup HERSHEY'S Semi-Sweet Chocolate Chips
1/2 cup raisins
Directions: Heat oven to 350. Grease and flour 12 cup Bundt pan. In large mixer bowl combine cake mix, eggs, water and oil; beat on low speed just until blended. Increase speed to me
(Note: I didn't put raisins in mine since I'm not a raisin fan.)
Chocolate Chip Glaze
In small saucepan combine
2 tablespoons butter or margarine,
2 tablespoons light corn syrup, and 2 tablespoons water. Cook over low heat, stirring constantly, until mixture begins to boil. Remove from heat; add 1 cup semi sweet chocolate chips. Stir until chips are melted and mixture is smooth. Continue stirring until glaze is desired consistency.
Voila! An easy, quick, delicious cake. Enjoy!
Saturday, March 6, 2010
Recipe: Risotto alla Milanese
about 5 cups beef or chicken stock (I used chicken)
good pinch of saffron threads
6 tbsp butter
1 onion, finely chopped
1 1/2 cups risotto rice
1 cup freshly grated Parmesan cheese (I simply used the regular Parmesan cheese that I use for spaghetti)
salt and ground black pepper
1. Bring the stock to a boil in a large pan, then reduce to a low simmer. Ladle a little hot stock into a small bowl. Add the saffron threads and set aside to infuse (steep).
2. Melt 4 tbsp of the butter in a large, heavy pan until foaming. Add the onion and cook over a low heat, stirring occasionally, for about 3 minutes, until softened and translucent but not browned.
3. Add the rice. Stir until the grains are coated with butter and starting to swell and burst, then add a few ladlefuls of the hot stock, including the saffron liquid and salt and pepper to taste (Suggestion: Add the salt later. The stock is pretty salty anyway, so I would just wait in order to see what the final product is.). Stir constantly over a low heat until all the stock has been absorbed. Add the remaining stock, a few ladlefuls at a time, allowing the rice to absorb all the liquid before adding more, and stirring constantly. After about 20-25 minutes, the rice should be just tender and the risotto golden yellow, moist and creamy. (Suggestion: I followed the directions for about 5 ladlefuls and then just dumped all the broth in, covered the pan, and put the heat on medium so the rice would boil a little. I stirred it every so often, until all of the broth was absorbed. It worked just fine. Also, I waited until it was creamy but not watery before I proceeded to the next step).
4. Gently stir in about two-thirds of the grated Parmesan and the remaining butter. Heat through gently until the butter has melted, then taste and adjust the seasoning, if necessary. Transfer the warm risotto to a warmed serving bowl or platter and serve hot, with the remaining grated cheese served separately.
-Recipe from Appetizers, Finger Food, Buffets, and Parties by (editor) Bridget Jones
My first impression? AMAZING!
There are some things I did differently. First of all, I added all 6 tbsp at the beginning (my accident). To compensate for the butter at the end, I just added the Parmesan when the rice was mostly creamy but still a little wet and I knew it would be able to melt fine. Also, I added all of the Parmesan not just two-thirds.
It tasted amazing. I HIGHLY recommend this dish. I felt as though it was salty enough that I didn't need to add salt at the start (but then again, I used salted butter, the broth, and the Parmesan has salt in it too). It is very filling (the book even touts that it can be served as a light meal on its own). It can pretty much go with anything. Also, you could probably add vegetables, and make other variations.
The only downer? It took a really long time to make. Also, just as a warning- saffron is pretty expensive ($10 for a little pouch).
I will DEFINITELY be making this again.
Recipe: Garlic Mushrooms
2 tbsp light olive oil or 1 oz butter
1lb closed cup mushrooms (you can find a 1lb box of mushrooms in the produce section at Weis)
Salt and freshly ground black pepper
4 cloves garlic, peeled and minced
1 tbsp parsley, finely chopped
Juice of 1/2 lemon
Heat the oil or butter in a very large frying pan. Add the whole mushrooms and fry gently for 10 minutes or so. Cover for the first couple of minutes, then stir occasionally to assist the steaming process.
Turn up the heat, season well and add the garlic. Continue to stir and cook until most of the liquid has evaporated and the mushrooms are no longer steaming, for another 5 or so minutes. Finally, sprinkle on the parsley and lemon juice, then stir through. Thread a couple of mushrooms on each cocktail stick and serve warm (I didn't thread the mushrooms).
- Recipe from Tapas by Tomas Garcia
My first impression? Loved it.
The mushrooms were tender and the taste was amazing. The lemon and the fresh parsley added a unique flavor to them that really caught me. Surprisingly, the garlic wasn't too much. I used olive oil instead of butter, and thought it was a great choice.
After a day or two, the mushrooms had a different flavor. When I first made them the lemon and the parsley were almost the only things I could taste. However, after a little while the flavors evened out and I thought they tasted even better.
Over all, definitely a win. They were quick to make and there were no expensive or rare ingredients. They are definitely best with some sort of beef. I had them with spare ribs, which was also good. I will definitely be making these again.
Sunday, February 7, 2010
Recipe: Pepper Jack Cheesy Mac

A couple of weeks ago I was sifting through the Sunday paper's coupons and came across the recipe for Pepper Jack Cheesy Mac, which was provided by the Carnation company. I put it aside thinking to myself, "Well, I love mac and cheese and I love pepper jack cheese, so why not?". Today the creation was made, and here is my first impression:
First impression: Not bad.
Pros: Well, if you like spicy food (which I occasionally do), this is pretty good. The pepper jack cheese itself was spicy and then I put on 1/2 tsp of crushed red pepper on the top, which gave it an extra kick. My family, who are less into spicy food than I am, thought it was a little too hot. I thought it was pretty good. I used Cabot Pepper Jack Cheese and Cabot Cheddar Cheese (both can be obtained at Costco). You can taste the distinct flavors of the cheddar and pepper jack, which makes the dish particularly catchy. I didn't think I would like the tortilla chips on top, and actually considered skipping it, but I think it added to it, and wound up really enjoying it.
Cons: I think it still need a little punch. Not a spicy punch, but it was a little bland for me. I think it actually had to do with the evaporated milk. I think next time instead of the evaporated milk I'm going to substitute it for some heavy cream and regular milk and see what happens. However, the evaporated milk still wasn't terrible but if I could substitute it for something better I would. In other words I still wouldn't be embarrassed to serve it at a party if it had the evaporated milk in it.
Over all, I enjoyed it. I think it's perfect for a party, especially a Super Bowl party or BBQ. I definitely would keep this recipe in mind for the future. Below is the actual recipe:
Pepper Jack Cheesy Mac
Ingredients:
Directions:
PREHEAT oven to 350° F. Lightly grease 2 1/2-quart casserole dish.
COOK macaroni in large saucepan according to package directions; drain. Return to saucepan.
ADD cheddar cheese, 1 1/2 cups Pepper Jack cheese, evaporated milk and black pepper to macaroni; stir until combined. Pour into prepared casserole dish. Combine remaining 1/2 cup Pepper Jack cheese, tortilla chips and red pepper flakes in small bowl. Sprinkle over top. Cover tightly with foil.
BAKE for 20 minutes. Uncover; bake for an additional 10 minutes or until lightly browned.
Recipe and photo obtained at: http://www.verybestbaking.com/products/carnation/virtual-kitchen/recipes/detail.aspx?ID=144036