Showing posts with label like. Show all posts

Sunday, August 4, 2013

Shrimp Tacos

This one also came directly out of Cooking Light’s August 2013 issue.  I’ll be honest- the corn relish makes this thing happen. More specifically, the lime juice in the corn relish makes this thing happen. The flavor was fresh and the meal was not heavy at all. Very light and delicious for summer. I highly recommend making it now while corn is still fresh on the market!!

2 cups fresh corn kernels (about 2 ears- please note that the original recipe called for 1 cup. I frankly  just felt this wasn’t enough and after making it, I was right. I’m glad I went with the 2 cups for 3 people)
1 ½ teaspoons olive oil
2 tablespoons chopped green onions
2 tablespoons chopped fresh cilantro (I didn’t add this in, but left it on the side for people to decide. Also, I gave an option for parsley instead. If you want to pick one, I will say that the cilantro was the better option with the lime juice)
3 tablespoons fresh lime juice, divided
¼ teaspoon salt
¼ teaspoon freshly ground pepper
1 diced peeled avocado
Cooking Spray
1 pound medium shrimp, peeled and deveined
2 teaspoons honey
¼ cup light sour cream
8 corn tortillas (I got gluten free)

Preheat boiler to high (I had mine set on 550, although my pan started to warp, so I’d probably go to 400F next time). Combine corn and oil in small bowl; toss gently to coat. Arrange corn in an even layer on a jelly-roll pan; broil 6 minutes or until lightly browned. Combine corn, onions, cilantro, 1 tablespoon juice, salt, pepper, and avocado in a medium bowl; toss gently.

Heat a large grill pan over medium high heat. Coat pan with cooking spray. Combine shrimp, 1 tablespoon juice, and honey in a medium bowl; toss to coat. Add shrimp to pan; cook 2 minutes on each side or until done.

NOTE: I did this step differently. I skewered my shrimp and broiled them at 400F after mixing them in the juice/honey concoction.

Combine sour cream and remaining 1 tablespoon juice in a small bowl. Warm tortillas according to package directions. Place 2 tortillas on each of 4 plates. Top each tortilla with about ¼ cup corn mixture, about 4 shrimp, and 1 ½ teaspoons sour cream mixture.

Serves 4


Enjoy!!

Saturday, July 21, 2012

Black Hair Product: Cantu Shea Butter


Before I start this review, I want to say that I think I have *almost* found the key to doing my hair.  I have found in the last couple of months that the less product, the better.  And!! The product that I do use cannot be heavy and has to be some sort of oil or combination of oils.  Otherwise, the petroleum based substances and heavy creams tend to cake on my hair and scalp giving me a dirty, greasy feel in hours after washing/conditioning/flat ironing. It’s annoying and it’s harmful to my hair.

The caveat? I have noticed that my scalp’s health has been deteriorating quickly. While my ends and color has been looking stellar, I’ve noticed that my hair has been thinning at a rapid pace.  I’d rather not go bald at 25.  My scalp gets extremely irritated-tightness, burning, some (painful) itching, which I cure by putting oil on my scalp, but I find that my hair still falls out.  I started using Dr. Miracle’s Hot Gro cream today (petroleum based with oils) and I’m going to give it two weeks with an application everyday (may the divine help me) and see what happens.  I’ll post with my results.

However, my scalp and hair woes are not the point of this post (although, if anyone has any suggestions re: the hair falling out, it would be MUCH appreciated!!).  My point was to review Cantu Shea Butter: No Drip Hair and Scalp Oil.


When I first got it I was attracted by the fact that it was not petroleum based.  It is simply solidified oils. I can tell you right now I have not been disappointed.  It has been one of the best hair product purchases I have made in a very long time.  I primarily use it on my scalp, which I find is the best use for it. It doesn’t drip all over the place (although you do have to watch that sometimes the oils do liquefy in the bottle and when you first squeeze it out it’s all oil) and since it is light oil and not petroleum based, it doesn’t cake on my scalp and hair making it greasy.  I find that it evenly distributes throughout my hair as the days go by to the point that I don’t have to worry about putting on product throughout the week. My hair is shiny and dark and styles really well with it.  It has become a part of my routine.

Downside? The applicator tip is awful and it’s actually really hard to squeeze the stuff out after awhile.  The bottle is a firm plastic so when you have a flat iron or comb in one hand and are trying to put the product on, you can’t squeeze stuff out easily.  I find that I have to squeeze the product out first on the counter top or my hand and then go from there.  Also, as I mentioned before, the oil does tend to liquefy a little bit at the top, but it’s usually not an overwhelming amount.

Overall I really recommend this product.  It’s light, it smells great, it works great.  I will definitely be buying this again.

Grade: A-

Thursday, August 11, 2011

Nutty for Nut Chips (and more)!

Before I get into the nitty-gritty of this post, I figured I would start off with a little catch-up. Back in June I was challenged to join WeightWatchers in an effort to get my eating habits on track and lose a couple of pounds while I’m at it. Well, I have to say that I love it! I’ve lost a couple of pounds (3 to be exact) and have come a long way in redeveloping my food regimen.

When I first started the Points Plus program, it was SO hard to keep inside my budgeted points. I have 29 daily points to spend and 49 that I can use over the span of a week. Trust me, when you are a fast-food junkie and a lover of everything deep fried and smothered in delicious chocolate, 29, and even 49 points, is NOT a lot. Example? One McDonald’s Quarter Pounder (no cheese) is 11 points. Large serving of fries? 13. That’s 26 points (not including the drink) in one meal. Yea, I think you get the point.

However, I’ll admit that I’ve come a long way since then. I can’t deny that McDonald’s fries are still my weakness, and I still go for the occasional donut from my favorite place in America, Dunkin’ Donuts, but not doing it every day has been key. Also, I’ve been staying away from a lot of processed foods and consuming a lot more salads and fruit, a [healthy] change so shocking that the first time I did it, my boss told me, “Yea, I saw that. That was weird.”

I have to say to anyone considering changing their eating habits or losing weight, try this! WeightWatchers isn’t a one-time diet. It’s a lifestyle change, and you won’t want to go back to junk food [often] after you’ve tried it.

Ok, now that I’ve gotten that out of my system, allow me to circle back to the topic of this post. I have realized that there isn’t a whole lot of common knowledge on what organic snack foods are good, and frankly, these products are a little pricey to experiment with, so I thought I’d “chip” in and give my thoughts on some of the stuff that I have tried thus far. Here’s this week’s snack review:

Blue Diamond’s Nut Chips with Sea Salt- These are made from almonds and brown rice. They are your (gluten free!) equivalent to corn chips. I loved them! I thought they were great with salsa (0 points). I do have to say, though, that the serving size is about all you can take. Also, you don’t get a whole lot in the bag. I do recommend them, though. 3 points per serving (15 chips)

Nature’s Promise Kettle Corn- This is my favorite of the week. This product is just, well, delicious! It has the perfect combination of salt and sweet. The best part?? Two cups is only three points! This snack is going to be in my lunch bag for awhile. 3 points per serving (2 cups)

Donut peaches- You may have seen them already. They are peaches but smaller and flatter, and in the shape of donuts. They are SUPER sweet, and are great if you don’t want to eat a huge peach, but just have the nibbles. Highly recommend these. 0 points per serving

Watermelon- In my humble opinion, watermelon is the second best fruit this season (other than donut peaches). It’s not the sweetest that it’s been in the past, but out of the pickings this year, it has to be one of the best options. It is also great for a fruit salad. 0 points per serving

Wednesday, June 1, 2011

Black Hair Product: L'Oreal Nature's Therapy Scalp Relief

More hair products!

The last time I got my hair relaxed, my scalp had an awful time recovering. I was flaking, itching, burning more than I ever had before. I tried some products that contained sulfur, but not only would my hair smell horrible, the problem didn’t go away completely, it just eased it.

Then I got this product. It works amazing. It smells great, so you don’t have to worry about any lingering medicinal or sulfur smells. It is easy to apply because of the applicator tip, and the best part? It actually works. When you apply it, it tingles your scalp in the places that your scalp is irritated, giving you a very refreshing cooling sensation. You won’t have flaking and barely any itching after using it. Furthermore, it gets rid of it, not just eases your suffering (and believe me, I was suffering) for a couple of days.

After using it, I was in a good place to be able to get other petroleum based products to start maintaining my scalp so it wouldn’t be so damaged after my next relaxer. I HIGHLY recommend this product if you are having dry scalp issues.

The downside to it? It isn’t a large bottle, so you use it quickly. It’s not the cheapest thing in the world (but then again, you are paying more for other products that don’t really work), and unfortunately, it’s not all that accessible anymore. For some reason, my local Sally’s stopped carrying it and I had to order it off of Amazon.com. Also, like some other reviews of this product, I have to agree –you can’t use this product by itself. I got Neutragena’s T-Gel shampoo and a couple of other anti-itch/scalp repair shampoos (NOT HEAD AND SHOULDERS!!!), and between that and this product, my scalp was cured in less than a week.

I highly recommend having this product around if you chemically treat your hair often, and don’t maintain your scalp on a regular basis.

Recipe: Streusel Raspberry Muffins

This was the breakfast that I made my mom for Mother’s Day. I tried to stick to a cheesy alliteration (Muffins with Mom, har har har). I have to say I was pleasantly surprised by these and they were a huge hit with my family.

First of all, they are a heavy muffin. They are also a little bit on the dry side, so I would definitely have the milk or coffee by your side when you eat these. That’s the only downside, though. They are really catchy and the raspberries in the middle keep the taste refreshing and help to break up the sweetness. I really enjoyed these and would definitely eat/make them again.

Baking them wasn’t difficult at all. I would suggest though, that the more raspberries you put in the middle, the merrier. I only put 3 or 4 in the middle and felt as though I could’ve put 5 or 6 in the middle of each and would’ve been better off. Also, I couldn’t get the batter to stretch to a full dozen. I got 11 muffins, so just keep that in mind when you pour the batter in the pan.

Here’s the recipe:

“Streusel Raspberry Muffins” (from 25 Years of Favorite Brand Name Baking)

1 ½ cups all purpose flour

½ cup sugar

2 teaspoons baking powder

½ cup milk

½ cup (1 stick) butter, melted and cooled

1 egg, beaten

1 cup fresh or individually frozen unsweetened raspberries

Preheat oven to 375. Grease 12 standard muffin cups or line with paper baking cups. Prepare Pecan Streusel Topping (recipe below); set aside.

Combine flour, sugar, and baking powder in large bowl. Combine milk, butter and egg in small bowl until blended; stir into flour mixture just until moistened. Spoon half of batter into muffin cups. Divide raspberries among cups, then top with remaining batter. Sprinkle Pecan Streusel Topping over tops. Bake 25 to 30 minutes or until golden and toothpick inserted into centers comes out clean. Cool in pan on wire rack 5 minutes.

Pecan Streusel Topping

Combine ¼ cup each: chopped pecans, packed brown sugar, and all purpose flour in a small bowl. Stir in 2 tablespoons melted butter until mixture resembles moist crumbs.


Rating: A

Recipe: Iced Oranges

This has to be my favorite summer recipe. This is by far not the first time I’ve made this, but I figured it would be nice to share anyway.

The taste of this is so refreshing. The orange juice and the lemon always mix just right to produce a refreshingly sweet and sour taste. The consistency always turns out, for me, like shaved ice, but I think it’s supposed to be more like a sherbert. It is great during the summer when it’s hot and you just don’t want ice cream, but you want something cold. I personally think it is a great compliment to a dessert, particularly a chocolate one such as brownies.

Making it is a snap. The recipe suggests that you squeeze your own oranges and then use the oranges as the “bowls” for the ice. My recommendation is if you’re not in it for the long haul, which I am most often not, you should just use 100% orange juice (I prefer Simply Orange or Tropicana) and just freeze it in a freezer-friendly plastic container. Squeezing the juice from the oranges and using the oranges as bowls, while cute and can be very flashy, is EXTREMELY time consuming (a lot longer than it has to be) and frankly, the time that I put into it wasn’t worth the end product. However, if you have time to kill and really just want to impress, have at it.

One final tip when making this recipe –I find that the more lemon juice I add (without turning the whole thing into a lemon flavor) the better it tastes. I would definitely taste it before you put it in the freezer for the first time and adjust it to how you like it.

Ok, here’s the recipe:

“Iced Oranges” (from Mediterranean: A Taste of the Sun in Over 150 Recipes)

2/3 cup sugar

Juice of 1 lemon

14 medium oranges* (substitute for 3 cups of orange juice)

8 fresh bay leaves, to decorate


Put the sugar in a heavy pan. Add half the lemon juice and ½ cup of water. Cook over low heat until the sugar has dissolved completely. Bring to a boil and boil for 2-3 minutes, until the syrup is clear. Let cool.

Slice the tops off eight of the oranges to make “hats”. Scoop out the flesh of the oranges and reserve. Put the empty orange shells and “hats” on a tray and place in the freezer until needed. *SKIP THIS STEP IF YOU ARE ONLY USING ORANGE JUICE

Grate the zest of the remaining oranges and add to the syrup. Squeeze the juice from the oranges and from the reserved flesh. There should be 3 cups. Squeeze another orange or add bought orange juice, if necessary. *ADD THE 3 CUPS OF ORANGE JUICE HERE INSTEAD OF DOING THIS STEP.

Stir the orange juice and remaining lemon juice, with 6 tablespoons water, into the syrup. Taste, adding more lemon juice or sugar, as desired. Pour the mixture into a shallow freezer container and freeze for 3 hours.

Transfer the mixture into a bowl and whisk to break down the ice crystals. Freeze for 4 more hours until firm but not solid.

Pack the mixture into the orange shells, piling it up, and set the “hats” on top. Freeze until ready to serve. Just before serving, push a skewer into the tops of the “hats” and push a bay leaf into each one.

Rating: A

Black Hair Product: BB Castor Oil with Aloe

Another product review for my “black hair product” section…Here it goes!

I have been using this particular product for several months now, and I have to say that I’m thoroughly impressed with it. I really think it is a must have for my regularly-used-product collection. It definitely rescued my hair when it was dry and severely damaged.

I have used this mostly in two ways. First, I use it after I’ve shampooed and conditioned my hair and I don’t want to straighten it. I apply it while my hair is wet by parting it in sections and applying just enough to coat my hair, particularly the ends. When I’m done, I put some mousse through it, and voila! My hair looks shiny, dark, and healthy. Moreover, it is soft and it doesn’t break off easily. I love it.

The second way I apply it is when my hair is dry, dried out, frizzy, and just needs to be revitalized. Once again, I part my hair and apply liberally. It softens my hair and moisturizes it, and doesn’t leave it too greasy. I also will apply it to my hair when it is straight, particularly the ends, in order to keep the frizzies at bay. It works great!

I would not recommend putting this product on your hair before you straighten your hair because I’ve found that it leaves my hair greasy and gross in the end and then I have to wash it out, over all damaging my do.

The thing I dislike most about this product is the smell. It’s not strong, but it has a plain smell that almost smells like vasoline. I don’t hate, but I’m not in love with it either. I’ll put it this way, if the product didn’t work as great as it does, I’d probably not buy this again simply because of the smell.

Over all, I highly recommend this product simply because it works. I will definitely be buying this again.

Tuesday, April 12, 2011

Avril Lavigne-Goodbye Lullaby

I don’t typically review music albums because while I enjoy them I’m not typically so inspired to tell the world about it. This time I’ll make an exception.

I will confess that I am a sucker for cheesy-bad music. I love music that panders to my inner teenage drama-queen. Usually this means I’ll listen to the likes of the Spice Girls, Kelly Clarkson, and the topic of this post, Avril Lavigne.

Up until this point, I’ve loved Avril for being such a high school brat. She produces cheesy music that has no real feeling but tells it like it is when you’re feeling immature and just want to let loose. After hearing the hit “What the Hell” off of her recent album, Goodbye Lullaby, I was sure I was in for another album to add to my collection of guilty pleasures.

After somewhat eagerly downloading her album off of Itunes (which, by the way, I was impressed that Apple didn’t charge me for “What the Hell” since I already purchased it and just downloaded all of the other songs that I didn’t have on a separate album list—which is important), I started it up. My jaw dropped. For the next hour or so, I was speechless, sometimes tearful. I was amazed.

Avril emits a talent in this album that I’ve never heard before coming from her. She demonstrates an incredible amount of growth and maturity. Her sound is different, and in a large sense a lot more pure than it ever was before. Her lyrics are heartfelt. Most importantly, though, she exudes and articulates perfectly her emotions into the songs she sings making the listener feel what she is feeling. In other words, she has finally stepped into the realm of music for the adult.

I’m particularly in love with 3 of the songs on this album- “Push”, “Wishing you were Here”, and “It’s not Enough”. I love each of them because of how I can tell that she experienced every ounce of feeling that her ballads talk about. She’s also so upfront in a mature way. She tosses aside the teenage spitefulness, and hangs onto her inner independence.

I do have to say that in some of her songs she comes off as screaming, but in my opinion I think it adds, positively, to her music because it enhances the point she is making. Additionally there is a lot of repetition in her songs, but again, I think it adds to the quality of the message she is trying to get across.

When I think about her hit “What the Hell” I have to seriously ask “What the hell?!”. The song is such a horrible misrepresentation of the album and her sound. I’m actually really happy that the song is not on the album list when I downloaded it because I would probably be just skipping over it.

In the end I highly recommend this album. I can honestly say that I was more than pleasantly surprised and am more than happy to say that this exciting find will not be going into my collection of high school drama music.

Friday, April 8, 2011

Recipe: Quick Oatmeal-Chocolate Chip Bars

I’ve been trying to find recipes lately that would start utilizing some of the left over ingredients that I had purchased before for other recipes. When I saw this recipe I thought this would be great since it seemed that it would turn out to be delicious, easy, and as I panned through the contents, I noticed I had most of what it called for.

On a separate note, I will warn you that this isn’t a recipe that is for people who are dieting or are conscious about corn syrups and sugars since it does call for dark corn syrup and a lot of other sweet things (sugar, sweetened flaked coconut, chocolate, etc.).

Now that the background story and the precautions are out of the way, here’s what I thought.

Baking

The preparation for this dessert was extremely easy. Because it uses Bisquick, which is practically instant cookie dough, putting everything together was a snap. It took about 10-15 minutes. The “most difficult” part was melting the butter (or, in this case, margarine) with the dark corn syrup on the stovetop.

There was little clean-up (a saucepan, a bowl, a measuring cup, and 2 spoons).

It took 40 minutes in the oven. I set the timer to 35 and I probably could’ve taken them out then, but I left them in for a couple more minutes for extra measure.

Finally, I liked that the bars didn’t have to be removed from the pan that I used. I simply cut the bars, left them in the glass dish, and put a cover on it.

I definitely give this an A+.

Taste

I was very eager to try these seeing as how I love the combination of oats and chocolate. I wasn’t disappointed. They were very chewy, and a little on the tough side. I attribute this to leaving it in the oven a couple of minutes longer than it should have. I also felt the taste was really oat-y, which I enjoy, but I probably could’ve cut back just a little. The coconut flavor wasn’t overpowering. In fact, it added a nice background flavor to it. The peanuts were the strangest dynamic to this. In retrospect I probably should have chopped the peanuts a little bit since it was weird and a little bit much on my palette when I encountered a cluster of peanuts in my bar.

Over all, I give the taste an A. I loved how chewy they were and I loved how all of the tastes blended together.

Recipe

Quick Oatmeal-Chocolate Chip Bars (taken from Creative Recipes with Bisquick vol. II, 1986)

1/3 cup margarine or butter

¼ cup dark corn syrup

1 ½ cups Bisquick baking mix

1 ½ cups quick-cooking oats

½ cup sugar

½ cup flaked coconut

½ cup salted peanuts

1 package (6 ounces) semisweet chocolate chips

1 egg


Heat oven to 300.

Mix margarine and corn syrup in 1 quart saucepan over medium-low heat, stirring constantly, until margarine is melted; reserve. Mix remaining ingredients except egg in large bowl; stir in corn syrup mixture and egg until moistened. Pat in ungreased rectangular pan, 13x9x2 inches.

Bake until light golden brown, 35 to 40 minutes. Immediately cut into bars, about 3 x 1 ½ inches; cool in pan 20 minutes. Remove from pan; cool completely.

Makes 40 bars.

Sunday, March 27, 2011

Around Harrisburg: Zembo Shrine Circus

I attended this circus with my little sister (Big Brothers Big Sisters!) a couple of weeks ago, and I have to say that I was pleasantly surprised.

This event is fantastic for kids and families. My little sister is 8, and she loved it (in fact, it was her second time seeing it when she was with me). There aren't a lot of animals in the show, though. There are ponies (for pony rides at the beginning), dogs, and pigs. As a result of this, the circus is filled with a lot of acrobatics and tricks.

The most disappointing thing about this circus were the clown acts, the magic act, and the lack of enthusiasm from the crowd. The clown acts simply were dull and weren't full of zest. Although, I have to say that it was a delight interacting with them outside of their act. They would circulate throughout the crowd during the show and the intermission to get the crowd more excited and more engaged. I thought that personal interaction was really cool. As for the magic act, there weren't a lot of tricks. It was basically the same trick over and over again. Finally, the crowd enthusiasm...there really wasn't any. People were so unresponsive it was disappointing. I had hoped for (a) more people in attendance and (b) for more excitement. It almost gave me the sense that I was witnessing the dying days of the circus culture. Sad.

That being said, I think this is a pretty fun event. While it's not a huge circus, it was definitely a cool thing to do during the day on Saturday or Sunday. I'd love to be proved wrong and see people get excited about it. I highly recommend it for next year.

Saturday, January 22, 2011

Book Review: At Home in the Muddy Water by Ezra Bayda

I just got done reading this book, and I have to say I was really impressed. It took me a couple of weeks to read it not because it was difficult, but because I found that I really just wanted to absorb the material.

After reading Krishnamurti's book, I have to say that this was a great follow up. Bayda provides the reader with a lot of tips on meditation and Zen practice as well as some guidance on what one should be focusing on when practicing. For me, this was really important seeing as how I'm often wondering if "I'm doing it right" or if I'm just going around in circles.

He divides his book into several different parts. In the first part, he lays out "What Practice Is." He introduces it by talking about our ego or the state of being cut off from our awareness of our True Self. He labels this our "substitute life." He talks about how we all have strategies that we use to escape fears that take over our lives. I think one of the most important statements he makes in this part which sums up the purpose of spiritual practice is the following:

"Genuine spiritual practice is never about fixing ourselves, because we're not broken. It's about becoming awake to who we really are, to the vastness of our True Nature, which includes even the parts of ourselves we label as "bad"."

I think one of the most enlightening and assuring points of this part was that he talks about how every person who practices "fails". They get discouraged, confused, often times taking a break or temporarily leaving the practice. He gives suggestions and talks about the different phases of discouragement and how to overcome them. I thought this was particularly reassuring since I often wonder if it is normal for me to have those feelings. He basically says that it is all part of a person's path.

I also really liked how he stressed what clear seeing actually is, and what practicing is actually about, or better yet, he gives you a broad, yet clear indication of what practicing will end up making a person see about themselves.

"Clear seeing is not the same as psychoanalyzing; we're not focusing on the past or trying to figure out why we think or behave as we do. This is an important point. We're simply attempting to observe ourselves as we are. As we begin seeing through our beliefs and strategies, we inevitably find judge and find fault with ourselves. But part of the practice of clear seeing is to observe our mind's tendency to judge and to notice how often we're not even aware of accepting our judgments as truth."

What a statement- we're not even aware of accepting our judgments as truth. This was the part that really drew me in. I think about how often I judge people or things or situations and my mind instantly takes these statements as truths. In fact I even managed to practice with that in mind for a day-watching my judgments and seeing how quickly I treat them as fact. I can tell you it's amazing what you find out about yourself.

In the next part of the book-"Attachment and Ideals"-Bayda starts off by talking about attachments. He describes attachments as the following:

"Attachments are simple beliefs-fantasies, in fact- that have become solidified as "truth" in our mind. They also partake of the energy of desire, which is based on the underlying belief that without some particular person or thing, we can never be free from suffering. Attachment also takes the form of avoidance; we believe we can't be happy as long as a particular person, condition, or object is in our lives."

This chapter on attachments led into the next chapter- addiction. Bayda opens up with the premise that we are all addicted to comfort. He talks about how each of us manipulate our lives, our thoughts, our beliefs to find comfort and avoid pain. He talks about how we are also addicted to our thoughts, our self-judgments, and our identities.

In the third part, Bayda talks about relationships. To me, this was the eye-opener of the book, but there were also points that I have to question.

Bayda starts off with this strong point:

"This is a key point; almost all of our relationship difficulties come from wanting something or someone to be different."

Think about your own relationships and hard times. Why did you have them? Because he/she wasn't giving you something you wanted or felt you needed? Exactly. Bayda argues that we were taught that relationships are supposed to give us something to make us feel better. As a result, we walk into every relationship (romantic, friendships, parental, etc.) with expectations, preferences, requirements. This transitions into the fact that we care for someone as long as they satisfy our needs and make us feel a special way.

He moves on to talk about how we transmit those expectations, "needs", etc. on to the other person, turning them into something they aren't, forcibly involving them in an unspoken pact that they have to meet these expectations. When that person doesn't (not if...when, because it is inevitable), we are exposed to fear and hurt, turning the other person into our enemy.

How do we move past this? How can we experience a relationship without all of these expectations? Bayda proposes that we have to learn to stop blaming others when we find ourselves in the middle of an emotional conflict. This means that we have to realize that all of our emotional distress comes from something we ourselves created. When we start to see this, we start to see our expectations and as we dig deeper, we see that these expectations actually come from our own fears and insecurities such as rejection or feelings of unworthiness.

I think the chapter that I had the hardest time agreeing with was the chapter on trust. Bayda proposes that when we feel as though our sense of trust has been shaken it is once again because our projections and expectations have been rejected. We feel groundlessness and pain. So far, I agree. However, as he moves into this topic he talks about how we need to deal with our projections and expectations and once we do, we will find that trust is almost a null topic because we will come to trust everyone. I suppose my problem with this is where do you draw the line? For example, if a person hits me, is my sense of trust not supposed to be shaken? At what point do I stop eliminating my expectations in a person? I agree that trust is more of a standard and mechanism to bar ourselves from fear, but at the same time, is it not needed so we aren't abused or taken for granted? Just something to think about.

All in all, I really enjoyed this book, and I would highly recommend it to someone who is interested in practicing or is even interested in spirituality. It makes you think and it definitely forces you to look at yourself, your thoughts, feelings, judgments, etc. Great read.

Sunday, January 16, 2011

Recipe: Southwestern-Style Chicken

Over all I liked this dish. I thought that the chicken was tender, and I liked the twist with the taco seasoning. However, I still think it could use some tweaking. I didn't add enough salt and pepper to it in the crock pot, so that was on me. Although, I still feel like it needed something. Although, I admittedly didn't use the diced tomatoes with jalapenos. I just used regular diced tomatoes since my family doesn't like hot foods. I also am not sure if I would use the flour and the taco seasoning to coat the chicken. I think I would just use the taco seasoning in the future and that's it. However, I didn't cook the chicken on the stove top (as I'll explain later) like the recipe called for either, so that could've been a part of my slight disappointment in taste. In summary, I thought it was a good break from what we normally have, and I would recommend it for others, although with the disclaimer to be open to adding their own flair.

Taste grade: B-

I have a philosophy about crock pot recipes-what's the point in cooking things in a crock pot if you have to cook the food beforehand? You might as well just cook the food on the stove top or in the oven. Thus, when the recipe told me to cook the food before putting it in the crock pot, I didn't do it. I thought it was easy to put together and there was very minimal clean up. It didn't take all 6-7 hours either. It took about 5.

Cook grade: A-

Here's the recipe. I'll add my tweaks and disclaimers on the bottom.

Southwestern-Style Chicken (from Slow Cooker: Appetizers, Soups, Stews, Sandwiches, Sides, and Delicious Desserts, 2005)

6 to 8 boneless skinless chicken thighs or breasts*
1 package (about 1 1/4 ounces) taco seasoning mix
1/4 cup flour
2 tablespoons vegetable oil
1 large onion, cut into 1-inch pieces
2 green peppers, cut into 1 inch pieces
1 can (14 1/2 ounces) diced tomatoes with jalapenos, undrained
Salt and pepper

Trim visible fat from chicken.

Reserve one teaspoon taco seasoning. Combine flour and remaining seasoning in plastic food storage bag. Add chicken, 1 to 2 pieces at a time; shake to coat.

Heat oil in large skillet over medium-high heat; brown chicken. Transfer chicken to slow cooker; sprinkle with reserved seasoning.**

Add onion to skillet; cook and stir until translucent. Transfer onion to slow cooker. Top with green peppers and tomatoes with juice. Cover; cook on low 6 to 7 hours or until chicken is tender. Season with salt and pepper to taste.***

*I used 8 pieces.

**I skipped this step all together, and just added all of the ingredients the recipe calls for in the crock pot. I did coat the chicken with the flour and taco seasoning. I sprinkled the left over taco seasoning on top once I put all the other stuff in the crock pot.

***To compensate for the fact that I didn't cook the chicken first, I simply put the crock pot on high for 2 hours to cook the chicken. After that I lowered it to the low setting, which is how it cooked for a remaining 2-2 1/2 hours.

Over all grade: B

Friday, January 7, 2011

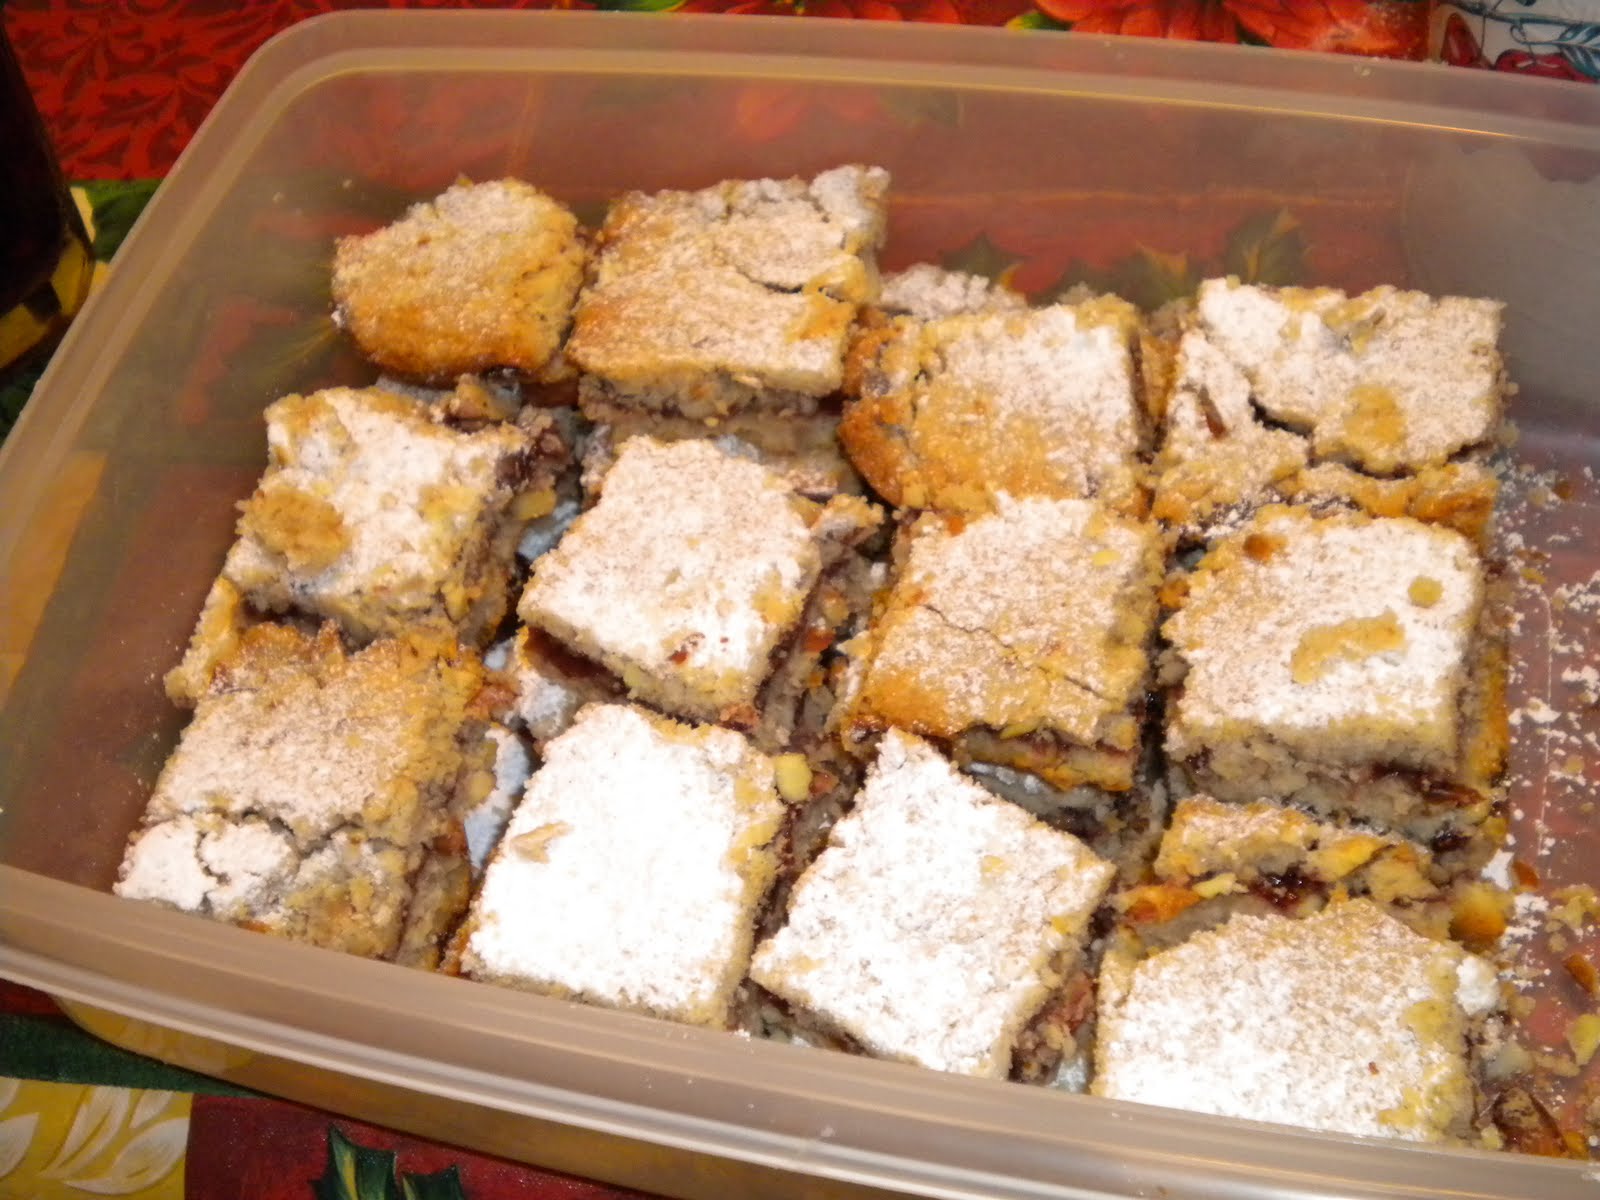
Recipe: Yuletide Linzer Bars

This was the third and last cookie I made for the holidays. I didn't go too overboard since my mom was making some as well.

I liked these. They were a favorite amongst the family as well. They are good with a hot cup of coffee or tea. The crust is like a crumble, with a light cinnamon flavor and ground almonds. The raspberry preserves in the middle at a delicious tartness to it that allows the cookie bar to not be too overbearingly sweet. I thought the raspberry was a great touch (as opposed to cherry or any other flavor).

Taste grade: A

Baking these were quite fun, in my opinion. The hardest part was crushing the almonds and putting the dough on top of the preserves. I noticed that there is just enough dough to make the bars. No waste, which we all know I love. In fact, the top will have holes in it and won't quite cover the preserves in parts, which is perfectly fine. After they come out of the oven, they are easy- one and done. Sprinkle some powdered sugar on top and your finished! Over all, I think this was the most put together and best recipe out of the three that I did.

Cook grade: A+

Here is the recipe:

Yuletide Linzer Bars (from Santa's Favorite Cookies: Sweet Treats for the Christmas Season, 1999)

1 1/3 cups butter or margarine, softened
3/4 cup sugar
1 egg
1 teaspoon grated lemon peel
2 1/2 cups all purpose flour
1 1/2 cups whole almonds, ground
1 teaspoon ground cinnamon
3/4 cup raspberry preserves
Powdered sugar

Preheat oven to 350. Grease 13 x 9 inch baking pan.

Beat butter and sugar in large bowl with electric mixer until creamy. Beat in egg and lemon peel until blended. Mix in flour, almonds, and cinnamon until well blended.

Press 2 cups dough into bottom of prepared pan. Spread preserves over crust. Press remaining dough, a small amount at a time, evenly over preserves.

Bake 35 to 40 minutes until golden brown. Cool in pan on wire rack. Sprinkle with powdered sugar; cut into bars.

Saturday, January 1, 2011

Recipe: Mocha Crinkles

Another one of my Christmas cookies was called "Mocha Crinkles". I picked this one because a) I like mocha and b) I thought the picture in the recipe book looked cool. Let's be honest- that's the reason why most of us pick a recipe.

These particular cookies are very cake-y when you taste them. They are PACKED with a big chocolate flavor. You get a very slight coffee after taste. I thought they tasted pretty good, but like I said, because it has a rich chocolate flavor, make sure you have milk nearby. Over all, I thought they were better than what I had thought they were going to turn out to be.

Taste grade: A-

As far as making them, they were pretty simple to make. In fact, I think I liked making them better than eating them. When you make them, though, I have to warn you that they have a strong coffee scent. Don't worry! It's not that strong in flavor once they are made (as I said above). It was really neat seeing them "crinkle" in the oven. The only thing about them is that you have to let them set in the refrigerator for a few hours before you make them.

Bake grade: A

I think these would be a nice addition to any sort of cookie gift basket. I do have to say that they crumble easily, though.

Ok, so here's the recipe:

Mocha Crinkles (from Santa's Favorite Cookies: Sweet Treats for the Christmas Season)

1 1/3 cups firmly packed light brown sugar
1/2 cup vegetable oil
1/4 cup low-fat sour cream
1 egg
1 teaspoon vanilla
1 3/4 cups all-purpose flour
3/4 cup unsweetened cocoa powder
2 teaspoons instant espresso or coffee granules
1 teaspoon baking soda
1/4 teaspoon salt
1/8 teaspoon ground black pepper
1/2 cup powdered sugar

Beat brown sugar and oil in medium bowl with electric mixer. Mix in sour cream, egg, and vanilla, set aside.

Mix flour, cocoa, espresso, baking soda, salt and pepper in another medium bowl.

Add flour mixture to brown sugar mixture; mix well. Refrigerate dough until firm, 3 to 4 hours.

Preheat oven to 350. Pour powdered sugar into shallow bowl. Set aside. Cut dough into 1 inch pieces; roll into balls. Roll balls in powdered sugar.

Bake on ungreased cookie sheets 10 to 12 minutes or until tops of cookies are firm to touch. Do not overbake. Cool on wire racks.


Over all grade: A-

Monday, December 27, 2010

Recipe: Almond Milk Chocolate Chippers

These turned out amazing. They weren't too "almond-y", and they had just the right amount of chocolate. They are just like regular chocolate chip cookies except instead of vanilla extract, you use almond (or almond-flavored liqueur), and you put in almonds. I thought they were a great cookie for the holidays, or any time of the year really. They would be great to serve for a party or for kids, and of course, I'm sure Santa wouldn't be able to help himself either.

Taste grade: A+

Baking them was really easy too. Like I said, they were just like chocolate chip cookies, but with minor alterations. Little clean-up and easy to make.

Bake grade: A+

Over all, I highly recommend these cookies. Here is the recipe:

Almond Milk Chocolate Chippers (from Santa's Favorite Cookies: Sweet Treats for the Christmas Season, 1999)

1/2 cup slivered almonds
1 1/4 cups all-purpose flour
1/2 teaspoon baking soda
1/2 teaspoon salt
1/2 cup butter or margarine, softened
1/2 cup firmly packed light brown sugar
1/3 cup granulated sugar
1 large egg
2 tablespoons almond-flavored liqueur*
1 cup milk chocolate chips

Preheat oven to 350. To toast almonds, spread on baking sheet. Bake 8 to 10 minutes or until golden brown, stirring frequently. Remove almonds from pan and cool; set aside.

Increase oven temperature to 375.

Place flour, baking soda, and salt in small bowl; stir to combine.

Beat butter, brown sugar and granulated sugar in large bowl with electric mixer at medium speed until light and fluffy. Beat in egg until well blended. Beat in liqueur. Gradually add flour mixture. Beat at low speed until well blended. Stir in chips and almonds with mixing spoon.

Drop rounded teaspoonfuls of dough 2 inches apart onto ungreased cookie sheets.

Bake 9 to 10 minutes or until edges are golden brown. Let cookies stand on cookie sheets 2 minutes. Remove cookies with spatula to wire racks; cool completely.

Store tightly covered at room temperature or freeze up to 3 months.


*If you don't want to use the liqueur, use 1/4 to 1/2 teaspoon of almond extract for 2 tablespoons of liqueur. I used 1/4 of a teaspoon for a very light taste of almond extract.


Thursday, December 9, 2010

Recipe: Polpettes


Over all, I think these were really good. I think they are a good side dish. They are pretty much mashed potato patties with onion and feta cheese. The feta really added to the taste and made them a little bit unique.

Taste grade: B+

Cooking them took a little longer than I would have liked, especially for a side dish. In the recipe it says that you need 1.25 lbs of potatoes. I used about 5 potatoes (4 medium-large and 1 small). At first I thought this was too much, but I don't think it was. I then peeled them, cut them, and put them in the microwave for 20 minutes instead of boiling them over the stove top.

As for frying them, this was trickier than I thought. In the directions it says to fry them until brown. Well, let me tell you that they mean very dark brown. If you only lightly brown them, they fall apart. Also, you'll need more oil than what the recipe requires. This process took me a long time (most certainly longer than I wanted to stand in front of the stove).

This recipe also made a lot more than I anticipated.

Cook grade: B-

Ok, so here's the recipe if you want to try them on your own:

Polpettes (from Appetizers, Finger Food, Buffets, and Party Food, 2009)

1 1/4 lb floury (mealy) potatoes
1 cup feta cheese
4 spring onions (scallions), chopped
3 tbsp chopped fresh dill
1 egg, beaten
1 tbsp lemon juice
plain (all purpose) flour, for dredging
3 tbsp olive oil
salt and ground black pepper
fresh dill sprigs and shredded spring onions (scallions), to garnish
lemon wedges to serve

Cook the potatoes in their skins in lightly salted, boiling water until soft. Drain and cool slightly, then chop them in half and peel while still warm.

Place the potatoes in a bowl and mash until smooth. Crumble the feta cheese into the potatoes and add the spring onions, dill, egg, and lemon juice and season with salt and pepper. (The cheese is salty, so taste before you add salt.) Stir well, until combined.

Cover and chill until firm. Divide the mixture into walnut size balls, then flatten them slightly. Dredge with flour, shaking off the excess.

Heat the oil in a large frying pan and cook the polpettes, in batches, until golden brown on both sides. Drain on kitchen paper and serve hot, garnished with spring onions and sprigs of dill, and serve with lemon wedges.

Over all grade: B

Wednesday, November 17, 2010

Recipe: Chocolate Truffles


Now these were good, and very easy to make!

Cooking grade: A-

They were very simple to make. However, you do have to leave these in the refrigerator for 6-8 hours at least. I left them in for almost 24. Also, when you are rolling them into balls, they can get a little messy. I had to constantly wash my hands and wash the little scoop I was using since the chocolate was constantly sticking and it would melt easily in my hands so I couldn't form a ball. Other than that, though, I thought they were pretty fun to make. Also, I think they have a lot of potential with the coatings. It just depends on how much time you are willing to put into them.

Taste grade: B+

I give them a B+ because I didn't quite find a coating that I was completely satisfied with. I tried the unsweetened cocoa. Poor choice. The bitterness dries out your mouth. I tried the crushed hazelnuts. This was the best combination, in my opinion. I also tried confectioners' sugar. I haven't quite tried these yet, but I guarantee you I will be.

These are so rich and creamy. The semi-sweet chocolate makes the truffles taste so rich. I think the best part about these is that I actually want to eat these.


I would definitely serve these with coffee and for a dessert at a party. Since they are so easy to make, you can make a bunch of them in no time.

And now for the recipe:

Chocolate Truffles (Appetizers, Finger Food, Buffets, and Parties, 2009)

3/4 cup double (heavy) cream
1 egg yolk, beaten
10 oz plain (semisweet) Belgian chocolate, chopped (I used Ghiradelli's)
2 tbsp unsalted (sweet) butter, cut into pieces
2-3 tbsp brandy (optional-I didn't use it)

For the coatings:

(unsweetened) cocoa powder
finely chopped pistachio nuts or hazelnuts
14 oz plain (semisweet), milk, or white chocolate, or a mixture

Bring the cream to the boil, then remove the pan from the heat and beat in the egg yolk. Add the chocolate, then stir until melted and smooth. Stir in the butter and the brandy, if using, then pour into a bowl and leave to cool. Cover and chill in the refrigerator for 6-8 hours.

Line a large baking sheet with baking parchment. Using a very small ice cream scoop or two teaspoons, form the chocolate mixture into 20-30 balls and place on the parchment. Chill if the mixture becomes too soft.

To coat the truffles with cocoa, sift some powder into a small bowl, drop in the truffles, one at a time, and roll to coat well. To coat them with nuts, roll the truffles in finely chopped pistachio nuts or hazelnuts.

To coat with chocolate, freeze the truffles for at least 1 hour. Ina small bowl, melt the plain, milk, or white chocolate over a pan of barely simmering water, stirring until melted and smooth, then leave to cool slightly.

Using a fork, dip the frozen truffles into the cooled chocolate, one at a time, tapping the fork on the edge of the bowl to shake off the excess. Place on a baking sheet lined with baking parchment and chill. If the melted chocolate thickens, reheat until smooth. All the truffles can be stored, well wrapped, in the refrigerator for up to 10 days.


Over all grade: A-

I was very impressed.

Wednesday, November 10, 2010

Recipe: Chocolate Chip and Banana Pudding


I loved this recipe. First of all, this wasn't a regular pudding. It was a bread pudding. The way it was made was soooo cool. It was baked by being steamed in a double boiler for two hours. It was so neat. I loved how moist it was, too. The banana taste wasn't too strong. In fact, I would argue that perhaps it was too light. I think it would've been better, also, with nuts. The glaze that was used for this was...interesting. I think I would've tried a different chocolate glaze. Over all, I thought this recipe was not only awesome to make, but it was really tasty.

Pros: Too cool. It was delicious. There was also very little clean up.

Cons: It took a very long time to make. I suggest making this first before you start on a main dish for dinner. It needs to steam for two hours on the stove top. Also, the glaze I didn't feel was the best.

I would serve this for a girls' night or an intimate dinner setting.

Here's the recipe (from Appetizers, Finger Foods, Buffets, and Parties, 2009)

Chocolate Chip and Banana Pudding

1 3/4 cups self-raising (self rising) flour
6 tbsp unsalted (sweet) butter
2 ripe bananas
1/3 cup caster (superfine) sugar
4 tbsp milk
1 egg, beaten
4 tbsp plain (semisweet) chocolate chips
glossy chocolate sauce and whipped cream, to serve

Prepare a steamer or half fill a pan with water and bring it to the boil. Grease a 4 cup heatproof bowl. Sift the flour into a bowl and rub in the butter with your fingertips until the mixture resembles breadcrumbs.

Mash the bananas in a bowl. Stir them into the flour mixture, with the caster sugar.

Whisk the milk with the egg in a jug (pitcher) or small bowl, then beat into the pudding mixture. Stir in the chocolate chips and mix well until thoroughly combined.

Spoon the mixture into the heatproof bowl, cover closely with greaseproof (waxed) paper and a double thickness of foil, and steam for 2 hours, topping up the water as required.

Run a knife around the top of the pudding to loosen it, then turn it out on to a warm serving dish. Serve hot, with the chocolate sauce and a spoonful of whipped cream.

Recipe grade: A

Recipe: Risotto Frittata


Technically, a breakfast food, I wound up serving this for dinner as a side dish with chicken. It reminded me of a Southwestern omelet without meat. It was delicious. The egg added a dynamic to the dish that was very complimentary. The risotto was also fantastic. I highly recommend this dish.

Pros: Delicious. The product is amazing (in fact, you can tell by the picture, I didn't actually get a photo before me and my family ate the dish, hahaha). It was also fun to make.

Cons: LOTS of clean up. It also takes a very long time to make too. Also, the egg was a bit of a hassle. The recipe says to just pour the egg on top and let it sit for a couple of minutes. My suggestion is to stir it through the risotto. It took much longer than a couple of minutes to cook the egg on top and as a result the risotto started to burn on the bottom.

I would serve this for a small brunch. I think it would be great for the holidays, as well.

Here's the recipe (from Appetizers, Finger Foods, Buffets, and Parties, 2009)

Risotto Frittata

2-3 tbsp olive oil
1 small onion, finely chopped
1 garlic clove, crushed
1 large red (bell) pepper, seeded and cut into thin strips
3/4 cup risotto rice
1 2/3-2 cups simmering vegetable stock
2-3 tbsp butter
2 1/2 cups button (white) mushrooms, thinly sliced
4 tbsp freshly grated Parmesan cheese
6-8 eggs
salt and ground black pepper

Heat 1 tbsp oil in a large frying pan. Add the onion and garlic and cook over a gentle heat, stirring occasionally, for 2-3 minutes, until the onion begins to soften but does not brown. Add the pepper and cook, stirring frequently, for 4-5 minutes, until softened.

Stir in the rice and cook gently for 2-3 minute, stirring constantly, until the grains are evenly coated with oil.

Add a quarter of the vegetable stock and season with a little salt and pepper. Stir over a low heat until the stock has been completely absorbed. Continue to add more stock, a little at a time, allowing the rice to absorb the liquid completely before adding more. Continue cooking and adding the stock in this way, stirring constantly, until the rice is al dente. This will take about 20 minutes.

In a separate small pan, heat a little of the remaining oil and some of the butter. Add the mushrooms and cook quickly over a medium heat until golden. Transfer to a plate.

When the rice is tender, remove from the heat and stir in the cooked mushrooms and the Parmesan cheese.

Beat the eggs together with 8 tsp cold water and season well with salt and pepper. Heat the remaining oil and butter in an omelette pan and add the risotto mixture. Spread the mixture out in the pan, then immediately add the beaten eggs, tilting the pan so that the omelette cooks evenly. Cook over a moderately high heat for 1-2 minutes, then transfer to a warmed plate and serve in wedges.

*My tip: When having the rice absorb the stock, you can cover the pan for a minute or so ONLY (less is preferable). Stir frequently. This helps the rice soak in the stock faster in my opinion.

Recipe Grade: B (due to timing inaccuracies)

Sunday, October 24, 2010

That Really Burns My Biscuits (Part 2)! Recipe: Abracadabra Hats

Now these were easy to make. Super quick. I liked the taste of them, although I think I liked the Cheesy Bat Biscuits more. The thing I LOVE about these, though, is their flexibility!!! There are SO many options for these. You can make them more pizza-y and put sauce on them. You can put cheese on them. You can put different meats on them. So many different options. That's not to say that the option here is bad...because it's not. This recipe is also really good. It would make a fantastic appetizer at a party. However, it's recipe in which you can't be afraid to expand your horizons.

Pros: Flexibility, taste, easy clean up and easy prep. The pepperoni and salami add a really great taste to the biscuit.

Cons: I couldn't find the salami sticks they referred to here, so I had to buy a large roll (?) of salami, and then cut it when I went to put the hats together.

Like I said before, these would make a great appetizer at a party.

Ok, so here's the recipe:

Abracadabra Hats (from Halloween Food, Fun, and Crafts 2008)

1 package (8 ounces) crescent dinner roll dough
1/2 teaspoon dried basil
16 turkey pepperoni slices
3 to 4 salami sticks, cut into 2-inch pieces
2 cups pizza or marinara sauce

Preheat oven to 375. Separate dough and place individual pieces on work surface. Gently shape each piece into long triangle. Sprinkle triangles evenly with basil. Cut pepperoni slices into crescent shapes using small cookie cutter or knife. (Each slice will make 2 crescents) Place 1 salami stick piece along base of each dough triangle. Partially roll up dough to cover salami and create brim of hat. Place 2 pepperoni crescents on top part of each hat; place on ungreased nonstick baking sheet. Bake 12 minutes or until golden brown at edges. Meanwhile, warm sauce in small saucepan over low heat. Serve hats with warm pizza sauce for dipping.

Makes 8 servings.

If you come across the same problem I did with the salami, just take some salami and cut it into thin, long pieces. That's what I did and it worked out great.

Summary:

Grade: A (because of salami)

Cost: Minimal

Prep: Minimal

Clean up: Minimal