Showing posts with label easy prep. Show all posts

Sunday, August 4, 2013

Sour Cream and Onion Dip

This one comes directly out of Cooking Light’s August 2013 issue.  It was quite delightful and smooth. I dipped carrots, celery, lentil chips, and orange bell pepper.  The carrots and lentil chips were my favorite options. The dip was really delightful and extremely fast and easy to make. I highly recommend it for casual parties.

I did make some tweaks, though since the recipe originally called for canola oil (mmm..healthy…NOT) and canola mayonnaise.  See below:

1 teaspoon olive oil
2 cups finely chopped sweet yellow onion (it took me 2 onions to reach this- one large and one small)
1 tablespoon minced fresh garlic
¼ teaspoon salt, divided
1 cup reduced fat sour cream
½ cup safflower mayonnaise
2 tablespoons minced fresh chives, divided
¼ teaspoon ground black pepper (they originally used white, though)

Heat a small skillet over medium-high heat. Add oil to pan; swirl to coat. Add onion, garlic, and 1/8 teaspoon salt; cook 4 minutes, stirring frequently. Reduce heat to medium-low; cook 6 minutes, stirring frequently. Cool onion mixture slightly.

Combine sour cream, mayonnaise, 1 ½ tablespoons chives, pepper, and remaining 1/8 teaspoon salt in a large bowl. Add onion mixture; stir well. Top with remaining 1 ½ teaspoons chives.

Serves 12


Enjoy!

Saturday, July 13, 2013

Gluten Free Zucchini-Walnut Bread

I made this absolutely delicious zucchini-walnut bread today.  When I say delicious, I mean my family and I (three of us) almost ate the whole thing in one sitting.  Moist and not too sweet, I made it to accompany dinner. I was really surprised that the bread actually rose (if you aren’t used to gluten-free cooking, not many doughs actually rise).  I HIGHLY recommend this recipe.  AND! It’s gluten-free. It’s not candida-friendly since it contains maple syrup, but it does have a good amount of fat in it and some protein (which is great if you are a fast oxidizer like me!).  Below is the recipe, which I tweaked because it was originally a Betty Crocker recipe and no offense to Betty, but she "ain’t" all that healthy.


Gluten Free Zucchini-Walnut Bread

½ cup pure maple syrup (if you don’t feel it’s sweet enough, you can still add up to another ¼ cup in order to get the equivalent of the cup of sugar that the original recipe called for)

2 brown, organic eggs

2/3 cup olive oil (If you aren’t using olive oil to bake, I suggest using it.  Your baked goods are guaranteed to always come out moist.)

1 teaspoon vanilla

1 ¼ cup gluten-free all-purpose rice blend (Note: I used one that already had guar gum in it, but if you are using one that doesn’t have guar or xantham gum, then add ½ teaspoon xantham gum to the recipe)

1 teaspoon gluten free baking powder

1 teaspoon ground cinnamon

½ teaspoon baking soda

¼ teaspoon sea salt

2 cups shredded zucchini

½ cup chopped nuts

Heat oven to 350°F. Lightly grease bottom only of 9x5-inch loaf pan (I used coconut oil to do this and the bread slipped right out when it was done). In large bowl, beat maple syrup and eggs with electric mixer on medium speed until well blended. Add oil and vanilla; beat until smooth. In medium bowl, mix flour blend, baking powder, cinnamon, xanthan gum (if needed), baking soda and salt. Gradually beat into egg mixture on low speed until blended. Stir in zucchini and nuts. Pour batter into pan. Bake 1 hour to 1 hour 10 minutes or until toothpick inserted in center comes out clean. Cool in pan 15 minutes. Remove from pan to cooling rack; cool completely, about 2 hours.

Enjoy!!!

Wednesday, November 17, 2010

Recipe: Chocolate Truffles


Now these were good, and very easy to make!

Cooking grade: A-

They were very simple to make. However, you do have to leave these in the refrigerator for 6-8 hours at least. I left them in for almost 24. Also, when you are rolling them into balls, they can get a little messy. I had to constantly wash my hands and wash the little scoop I was using since the chocolate was constantly sticking and it would melt easily in my hands so I couldn't form a ball. Other than that, though, I thought they were pretty fun to make. Also, I think they have a lot of potential with the coatings. It just depends on how much time you are willing to put into them.

Taste grade: B+

I give them a B+ because I didn't quite find a coating that I was completely satisfied with. I tried the unsweetened cocoa. Poor choice. The bitterness dries out your mouth. I tried the crushed hazelnuts. This was the best combination, in my opinion. I also tried confectioners' sugar. I haven't quite tried these yet, but I guarantee you I will be.

These are so rich and creamy. The semi-sweet chocolate makes the truffles taste so rich. I think the best part about these is that I actually want to eat these.


I would definitely serve these with coffee and for a dessert at a party. Since they are so easy to make, you can make a bunch of them in no time.

And now for the recipe:

Chocolate Truffles (Appetizers, Finger Food, Buffets, and Parties, 2009)

3/4 cup double (heavy) cream
1 egg yolk, beaten
10 oz plain (semisweet) Belgian chocolate, chopped (I used Ghiradelli's)
2 tbsp unsalted (sweet) butter, cut into pieces
2-3 tbsp brandy (optional-I didn't use it)

For the coatings:

(unsweetened) cocoa powder
finely chopped pistachio nuts or hazelnuts
14 oz plain (semisweet), milk, or white chocolate, or a mixture

Bring the cream to the boil, then remove the pan from the heat and beat in the egg yolk. Add the chocolate, then stir until melted and smooth. Stir in the butter and the brandy, if using, then pour into a bowl and leave to cool. Cover and chill in the refrigerator for 6-8 hours.

Line a large baking sheet with baking parchment. Using a very small ice cream scoop or two teaspoons, form the chocolate mixture into 20-30 balls and place on the parchment. Chill if the mixture becomes too soft.

To coat the truffles with cocoa, sift some powder into a small bowl, drop in the truffles, one at a time, and roll to coat well. To coat them with nuts, roll the truffles in finely chopped pistachio nuts or hazelnuts.

To coat with chocolate, freeze the truffles for at least 1 hour. Ina small bowl, melt the plain, milk, or white chocolate over a pan of barely simmering water, stirring until melted and smooth, then leave to cool slightly.

Using a fork, dip the frozen truffles into the cooled chocolate, one at a time, tapping the fork on the edge of the bowl to shake off the excess. Place on a baking sheet lined with baking parchment and chill. If the melted chocolate thickens, reheat until smooth. All the truffles can be stored, well wrapped, in the refrigerator for up to 10 days.


Over all grade: A-

I was very impressed.

Sunday, October 24, 2010

That Really Burns My Biscuits (Part 2)! Recipe: Abracadabra Hats

Now these were easy to make. Super quick. I liked the taste of them, although I think I liked the Cheesy Bat Biscuits more. The thing I LOVE about these, though, is their flexibility!!! There are SO many options for these. You can make them more pizza-y and put sauce on them. You can put cheese on them. You can put different meats on them. So many different options. That's not to say that the option here is bad...because it's not. This recipe is also really good. It would make a fantastic appetizer at a party. However, it's recipe in which you can't be afraid to expand your horizons.

Pros: Flexibility, taste, easy clean up and easy prep. The pepperoni and salami add a really great taste to the biscuit.

Cons: I couldn't find the salami sticks they referred to here, so I had to buy a large roll (?) of salami, and then cut it when I went to put the hats together.

Like I said before, these would make a great appetizer at a party.

Ok, so here's the recipe:

Abracadabra Hats (from Halloween Food, Fun, and Crafts 2008)

1 package (8 ounces) crescent dinner roll dough
1/2 teaspoon dried basil
16 turkey pepperoni slices
3 to 4 salami sticks, cut into 2-inch pieces
2 cups pizza or marinara sauce

Preheat oven to 375. Separate dough and place individual pieces on work surface. Gently shape each piece into long triangle. Sprinkle triangles evenly with basil. Cut pepperoni slices into crescent shapes using small cookie cutter or knife. (Each slice will make 2 crescents) Place 1 salami stick piece along base of each dough triangle. Partially roll up dough to cover salami and create brim of hat. Place 2 pepperoni crescents on top part of each hat; place on ungreased nonstick baking sheet. Bake 12 minutes or until golden brown at edges. Meanwhile, warm sauce in small saucepan over low heat. Serve hats with warm pizza sauce for dipping.

Makes 8 servings.

If you come across the same problem I did with the salami, just take some salami and cut it into thin, long pieces. That's what I did and it worked out great.

Summary:

Grade: A (because of salami)

Cost: Minimal

Prep: Minimal

Clean up: Minimal

That Really Burns My Biscuits (part 1)! Recipe: Cheesy Bat Biscuits

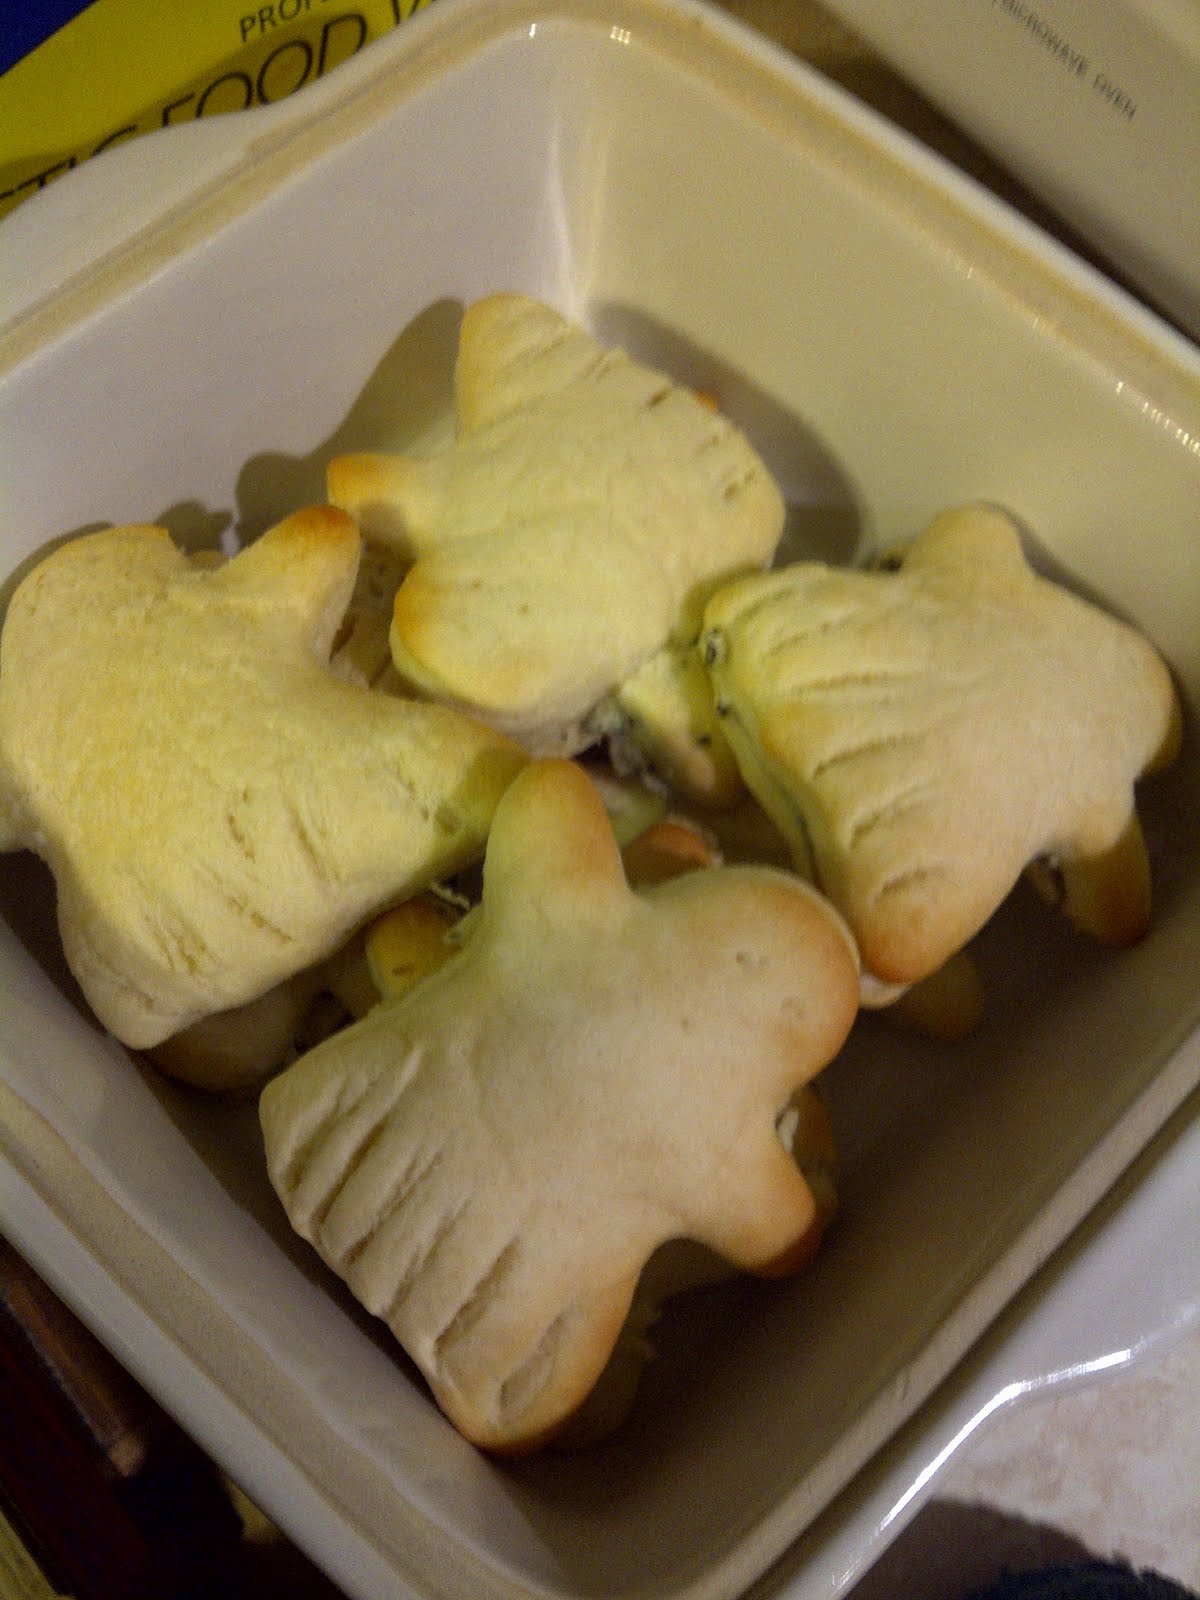
Ok, so they aren't actually bats...they're ghosts, but the outcome (taste-wise) was still the same, I'm sure. I did enjoy these. For how simple they were, I thought they were creative. The taste was different. They were a great substitute or replacement for garlic bread. I found the parsley and basil combination particularly grand. They complemented more than they were overbearing. If you have a pasta dish, these would be fantastic to go on the side.

Pros: Delicious and easy to make. The clean up was easy too. The taste was different (in a really good way!).

Cons: A lot of waste with the biscuits. In fact, I think I threw more dough away than I baked. I really was not happy about that. However, you could get around that by making the entire biscuit (without shaping them with a cookie cutter), or you could reuse the dough. I chose not to, though. I didn't realize I would be throwing so much out.

Things this recipe would be good for? Honestly, it doesn't make that much and you'd be probably spending a lot of time if you made them for a party. I'd say this recipe is great for a family meal. If you have small kids (or you are 5 at heart, like me), the cookie cutter effect is really neat. You could probably double the recipe of you have a large family or want to make it for a guest without too much trouble.

Annnnddddd here's the recipe:

Cheesy Bat Biscuits (from Halloween Food, Fun, and Crafts 2008)

1 can (16 ounces) jumbo buttermilk biscuits
3 tablespoons butter, melted and divided
1/4 cup grated Parmesan cheese
1 teaspoon dried parsley flakes
1 teaspoon dried basil

Preheat oven to 35o. Flatten each biscuit into shape just large enough to fit 3-inch bat cookie cutter. Cut out bat shape; discard scraps. Place biscuits on baking sheet. Lightly score biscuits to outline bat wings; poke holes with toothpick for eyes. Brush biscuits with 1 tablespoon butter. Bake 7 minutes. Meanwhile, combine cheese, remaining 2 tablespoons butter, parsley, and basil in small bowl. Turn biscuits on end and split into halves with forks. Spread 1 teaspoon cheese mixture on bottom half of each biscuit; replace biscuit top. Bake 3 minutes or until biscuits are golden brown.

Makes 8 servings.

That's all!

Grade: A- (because of waste)

Cost: cheap

Prep time: Minimal

Clean up: Minimal